If you ask ten different Mac users what their favorite app is, there’s a chance that you won’t hear Time Machine mentioned even once. In reality, Time Machine is arguably the most useful stock Mac app because it can be your only hope when you lose a critically important file or discover that your macOS installation has become corrupted.
If you don’t know how to restore from a Time Machine backup, then this article is just what you need to get back all important data with confidence because our detailed step-by-step instructions remove all guesswork.
How to Restore from Time Machine
Apple designed Time Machine to be easy to use, so learning to restore data or even the entire macOS operating system from it won’t cost you much time.
Method #1: Try To Perform a Time Machine Selective Restore
When to use: You should use this method if you want to restore specific files from Time Machine.
Time Machine is most commonly used to restore specific personal files, including apps, music, photos, email, and documents. Because it creates incremental backups, multiple copies of the same file are typically available, each copy from a different date.
To perform a Time Machine selective restore:
- Open Time Machine:
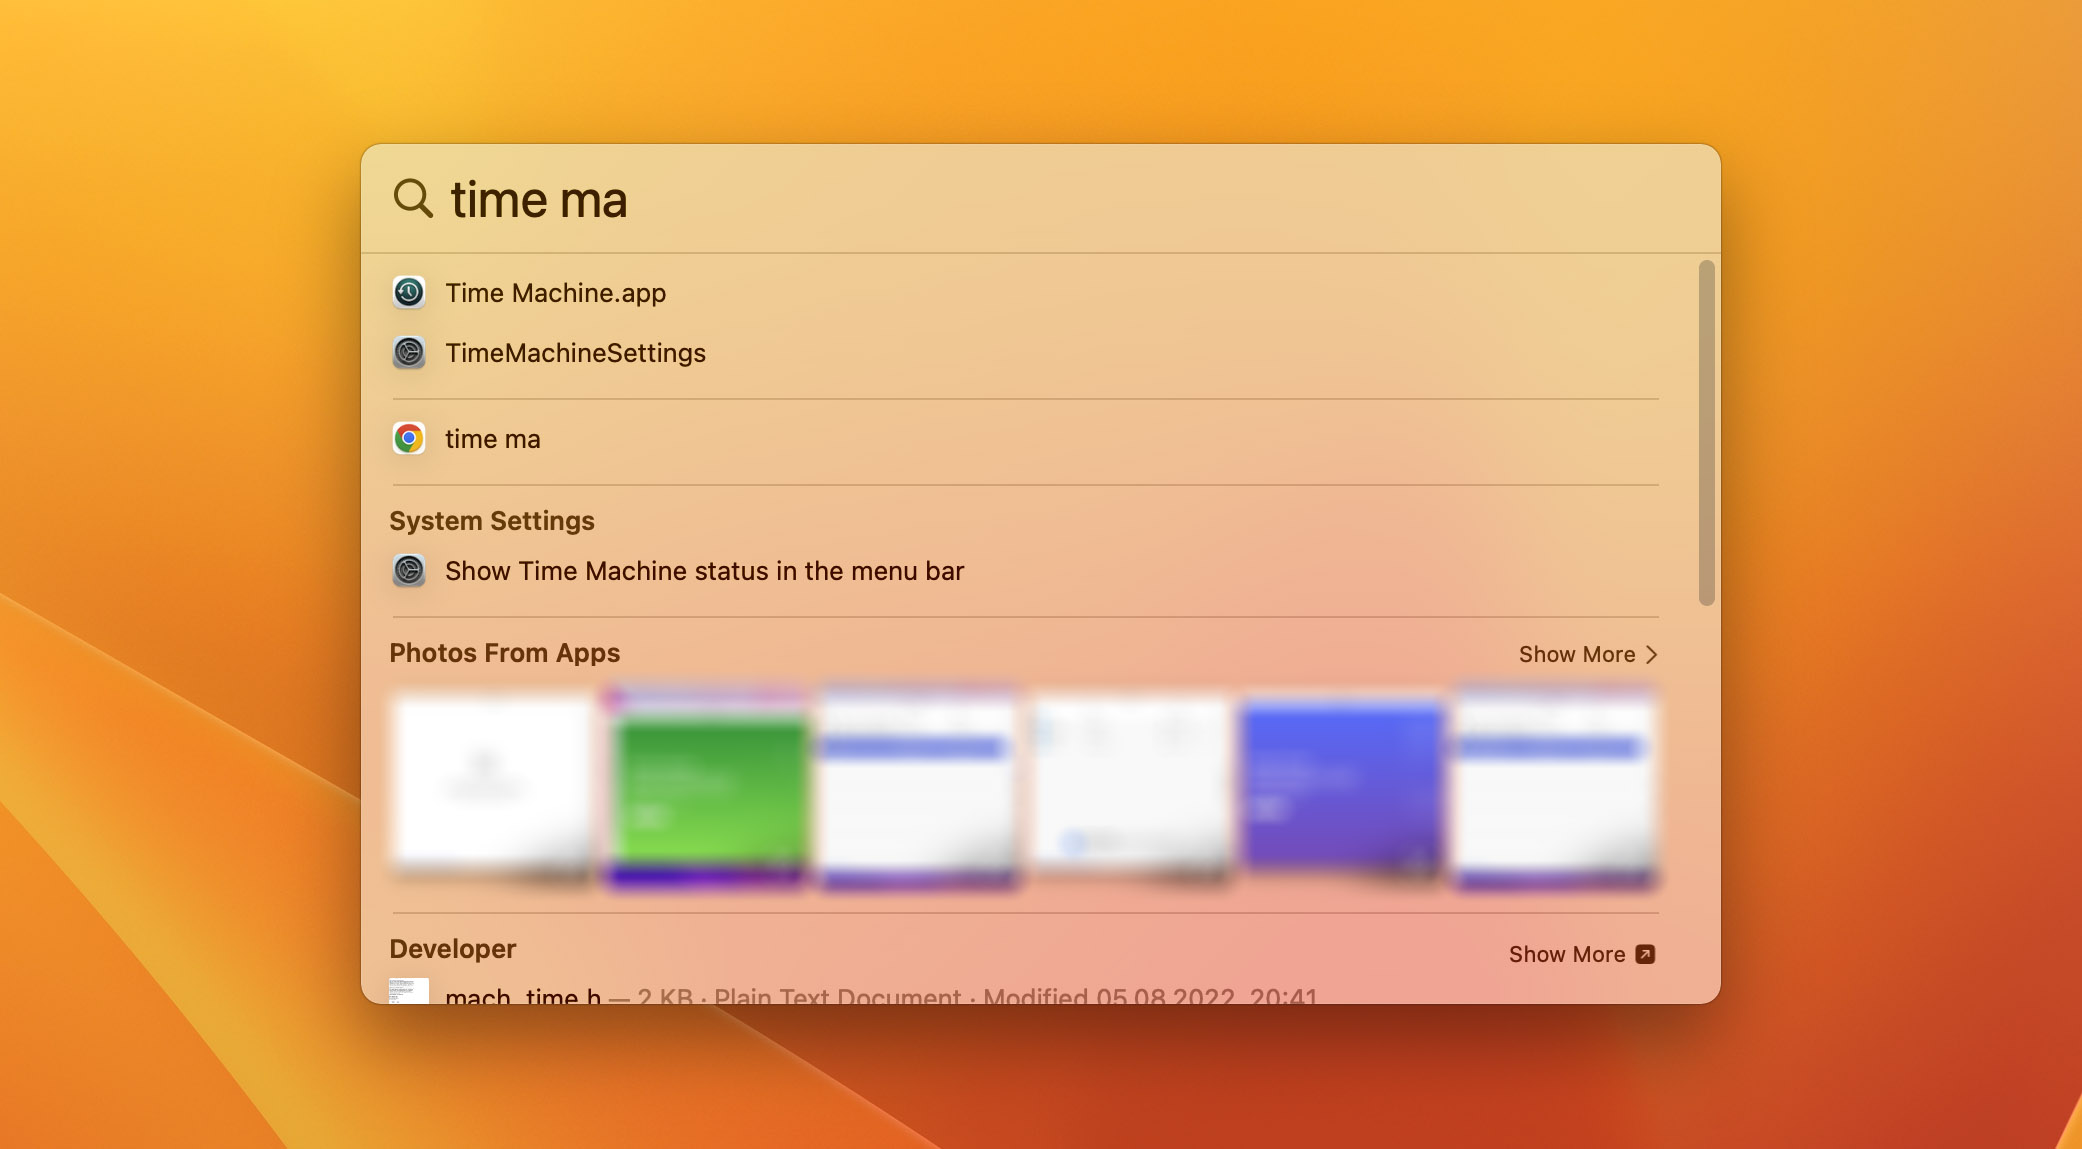
- Method #1: Press show Spotlight (Command + Space), type “Time Machine,” and select the corresponding option.
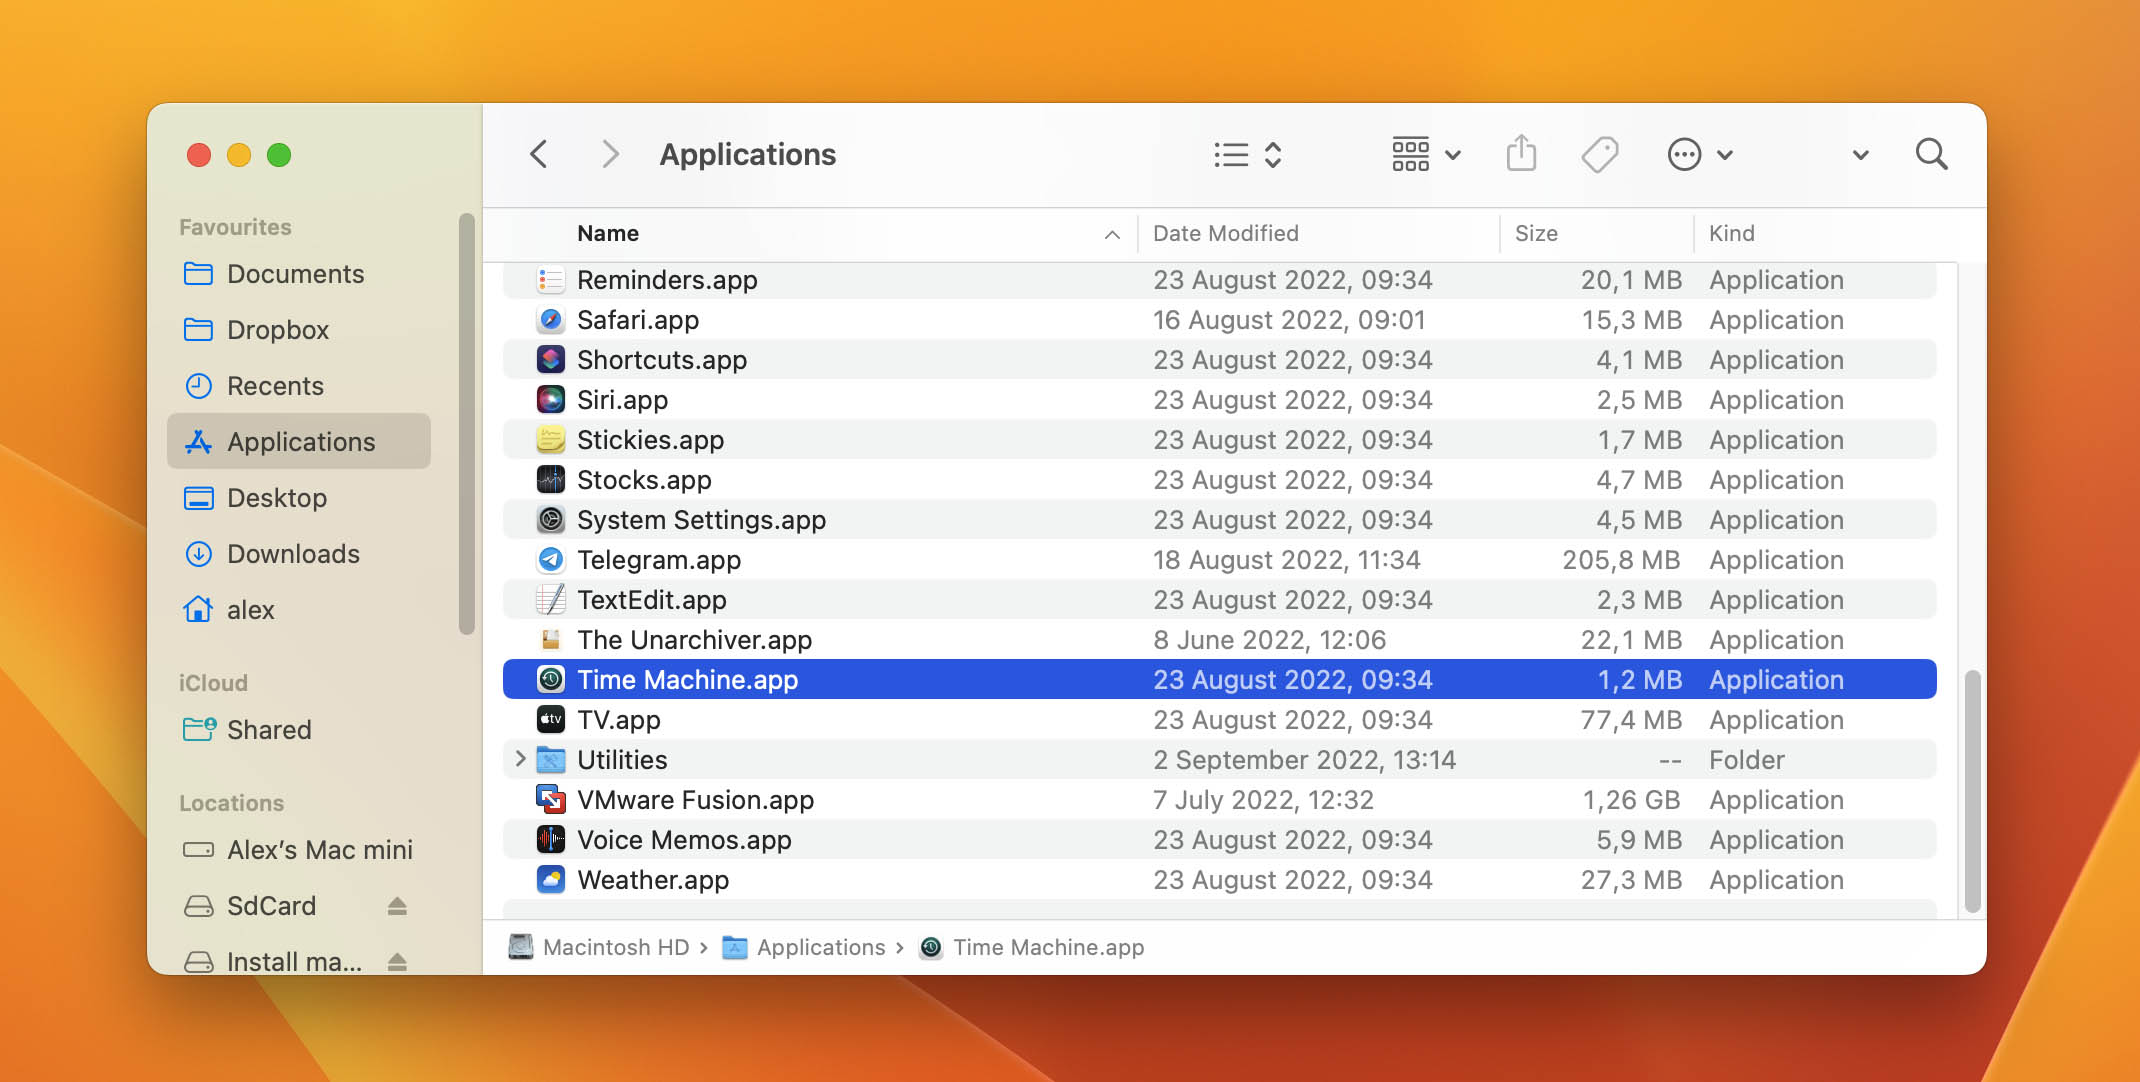
- Method #2: Open Finder, navigate to the Applications folder > Utilities > Time Machine.
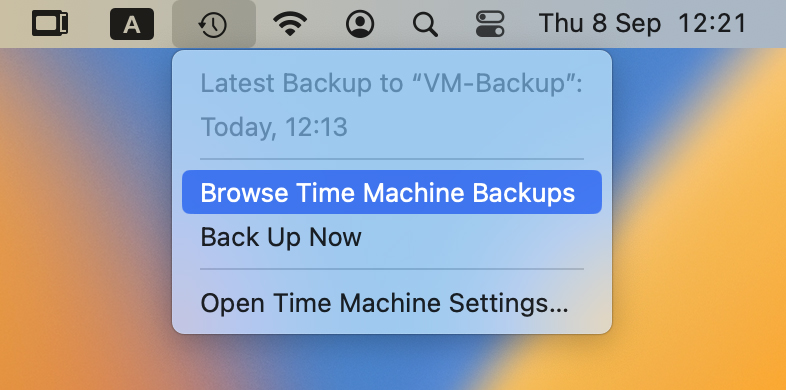
- Method #3: lick the Time Machine icon in the menu bar and select the Browse Time Machine Backups option.
- Method #1: Press show Spotlight (Command + Space), type “Time Machine,” and select the corresponding option.
- Navigate to the folder where the file was last located.
- Use the arrows and timeline to browse available backups.
- Select the file you want to recover.
- Click the Restore button to return the selected file to its original location.
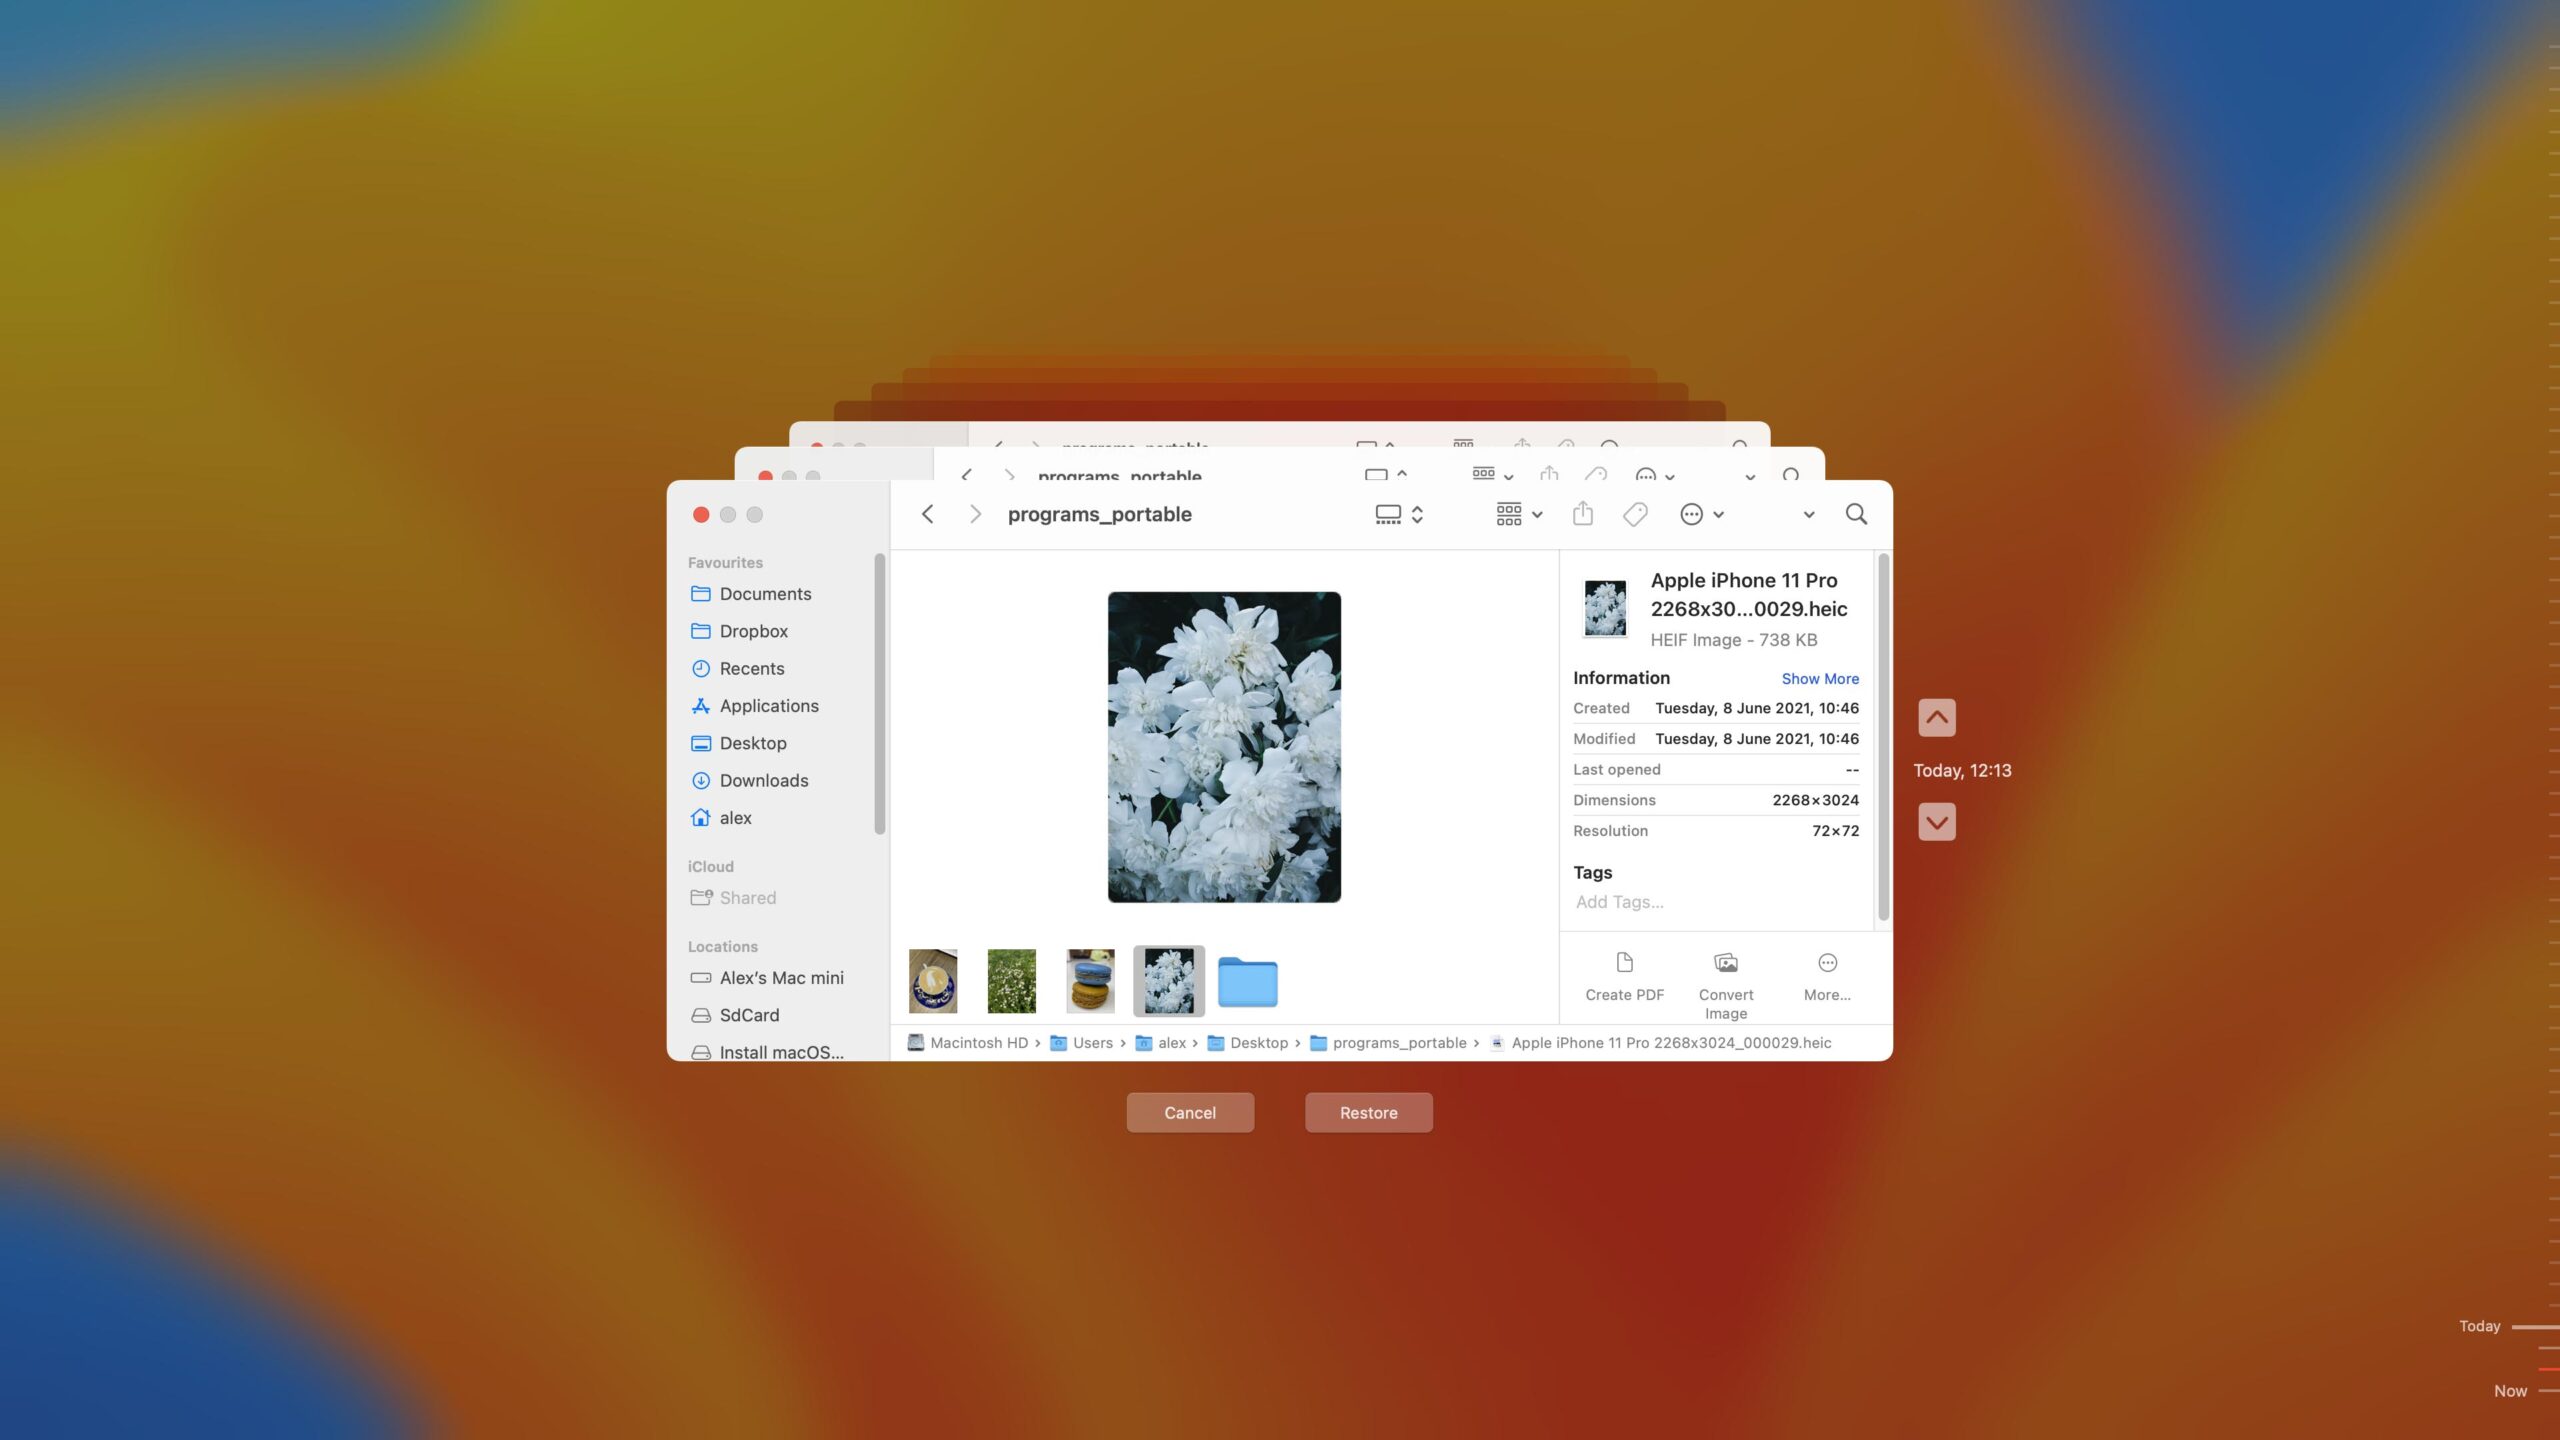
Of course, you can restore more than one file at a time by clicking and dragging the mouse cursor over all of the items.
Method #2: Use Time Machine to Restore the Entire Mac
When to use: We recommend you restore Mac from Time Machine to fix extensive data loss or serious problems with the macOS operating system.
Since Time Machine backs up nearly all user data, it can be used to restore the entire Mac after performing a macOS reinstall or moving to a new machine. To help users perform a complete Time Machine restore, Apple provides the Migration Assistant utility, which greatly simplifies the process.
To restore a Mac from Time Machine:
- Launch the Migration Assistant utility (Applications > Utilities) on the Mac you want to restore.
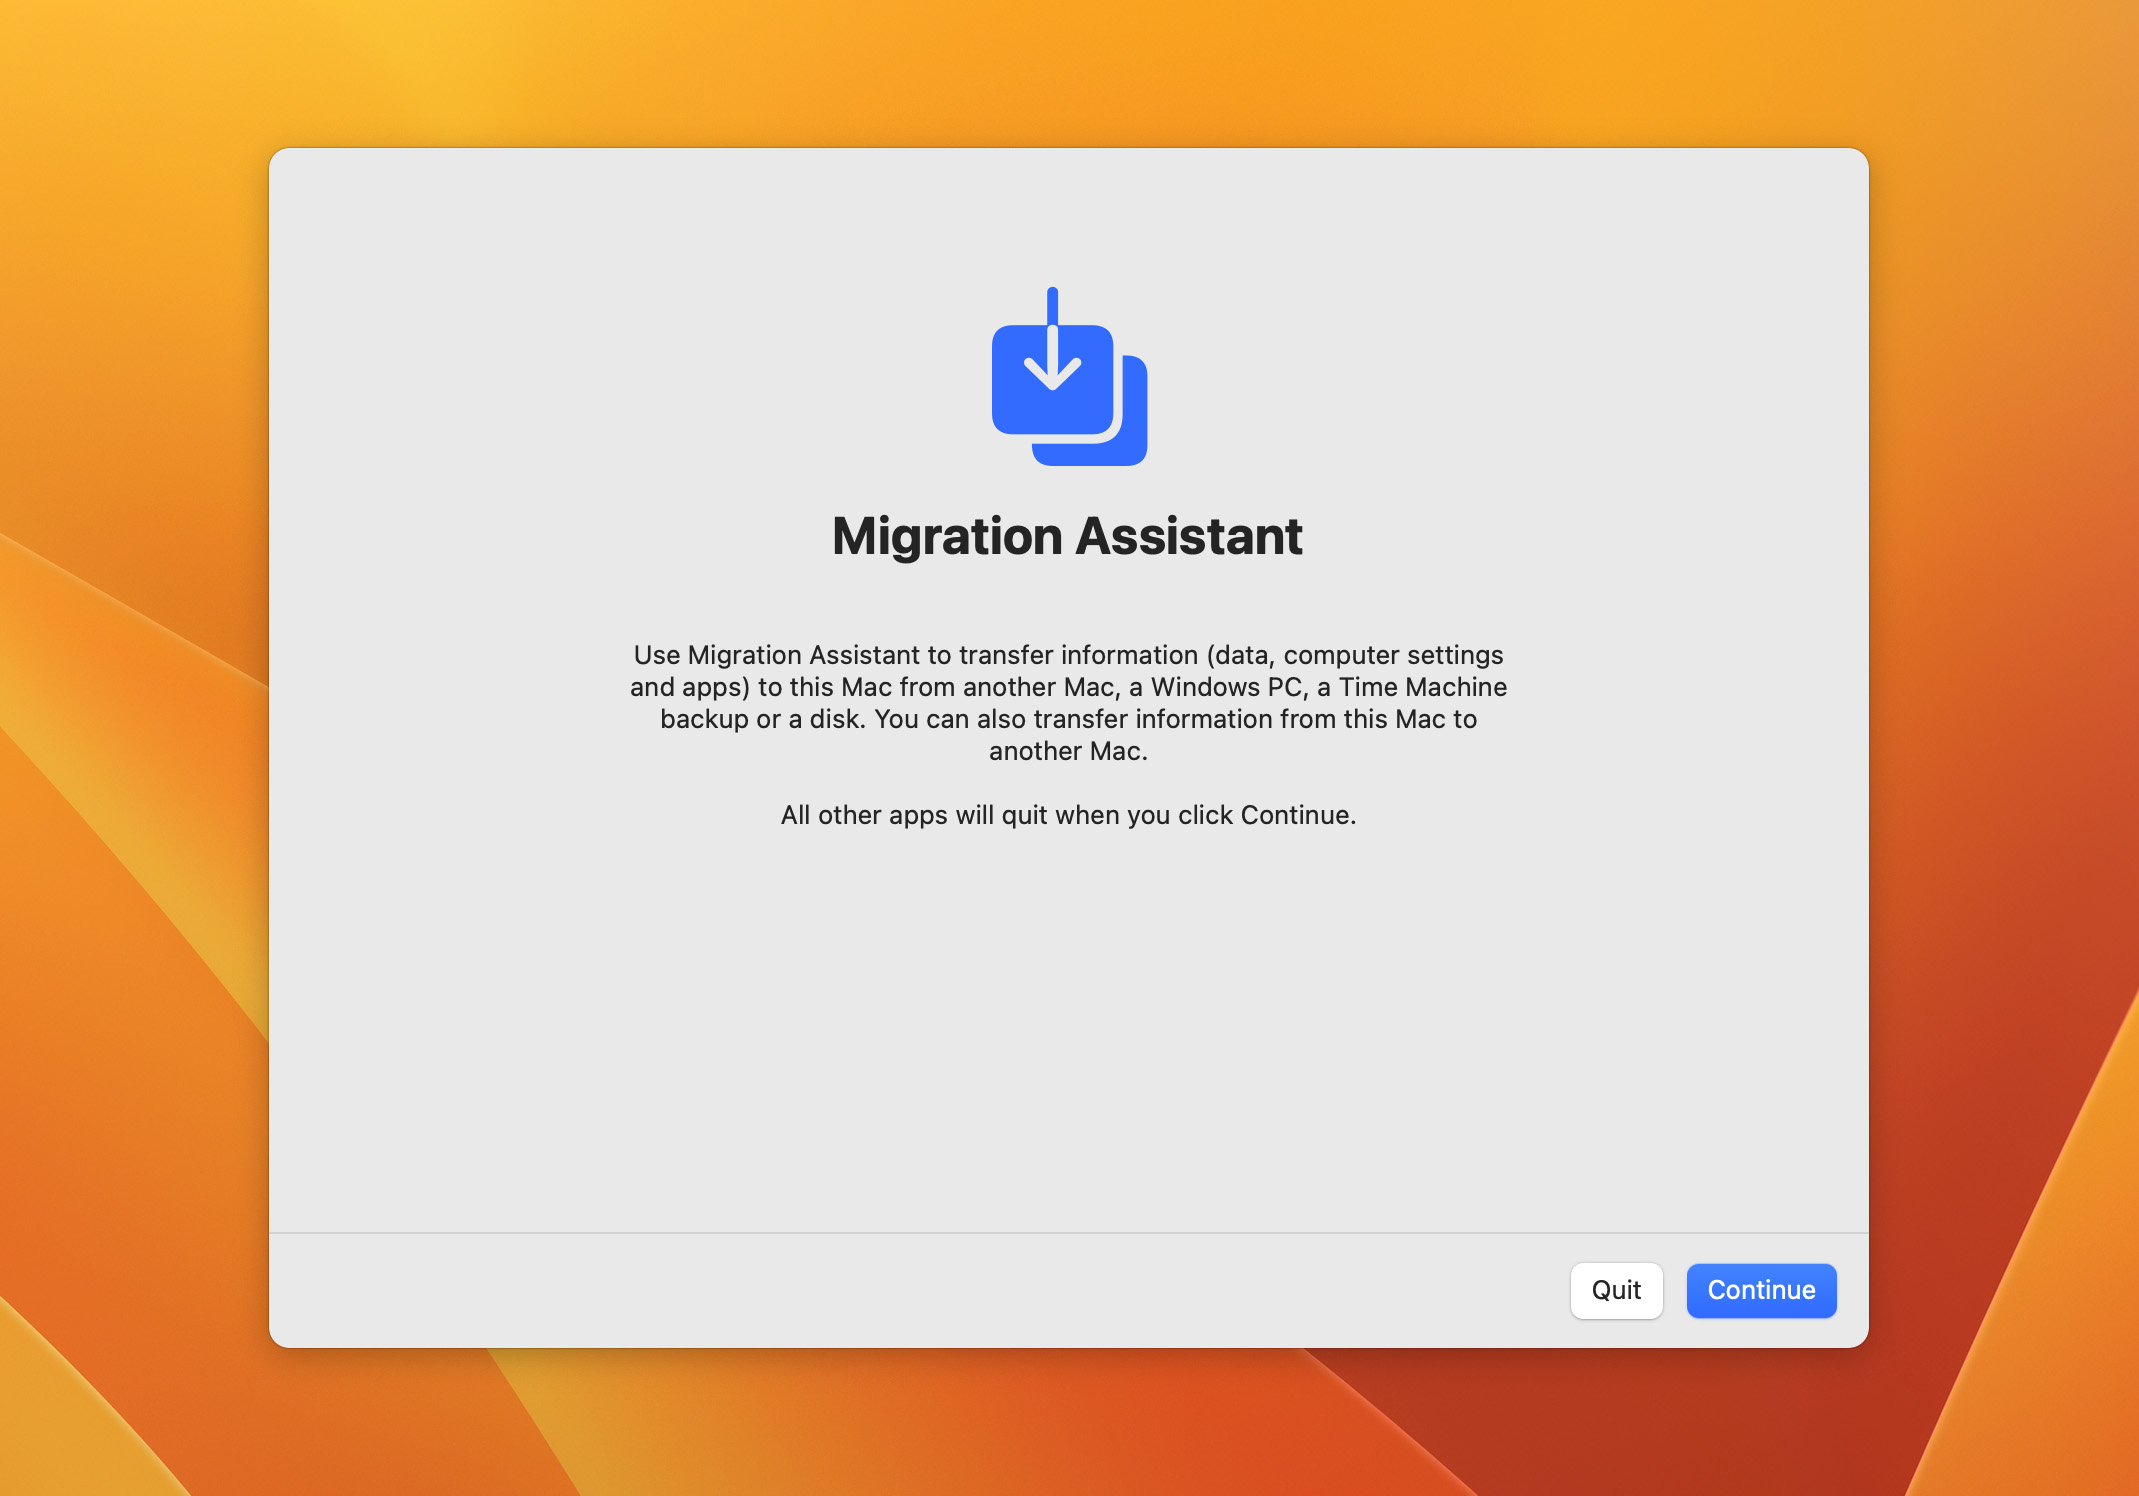
- Make sure your Time Machine backup drive is connected to the same Mac.
- Select the option to transfer from a Mac, Time Machine backup, or startup disk and click Continue.
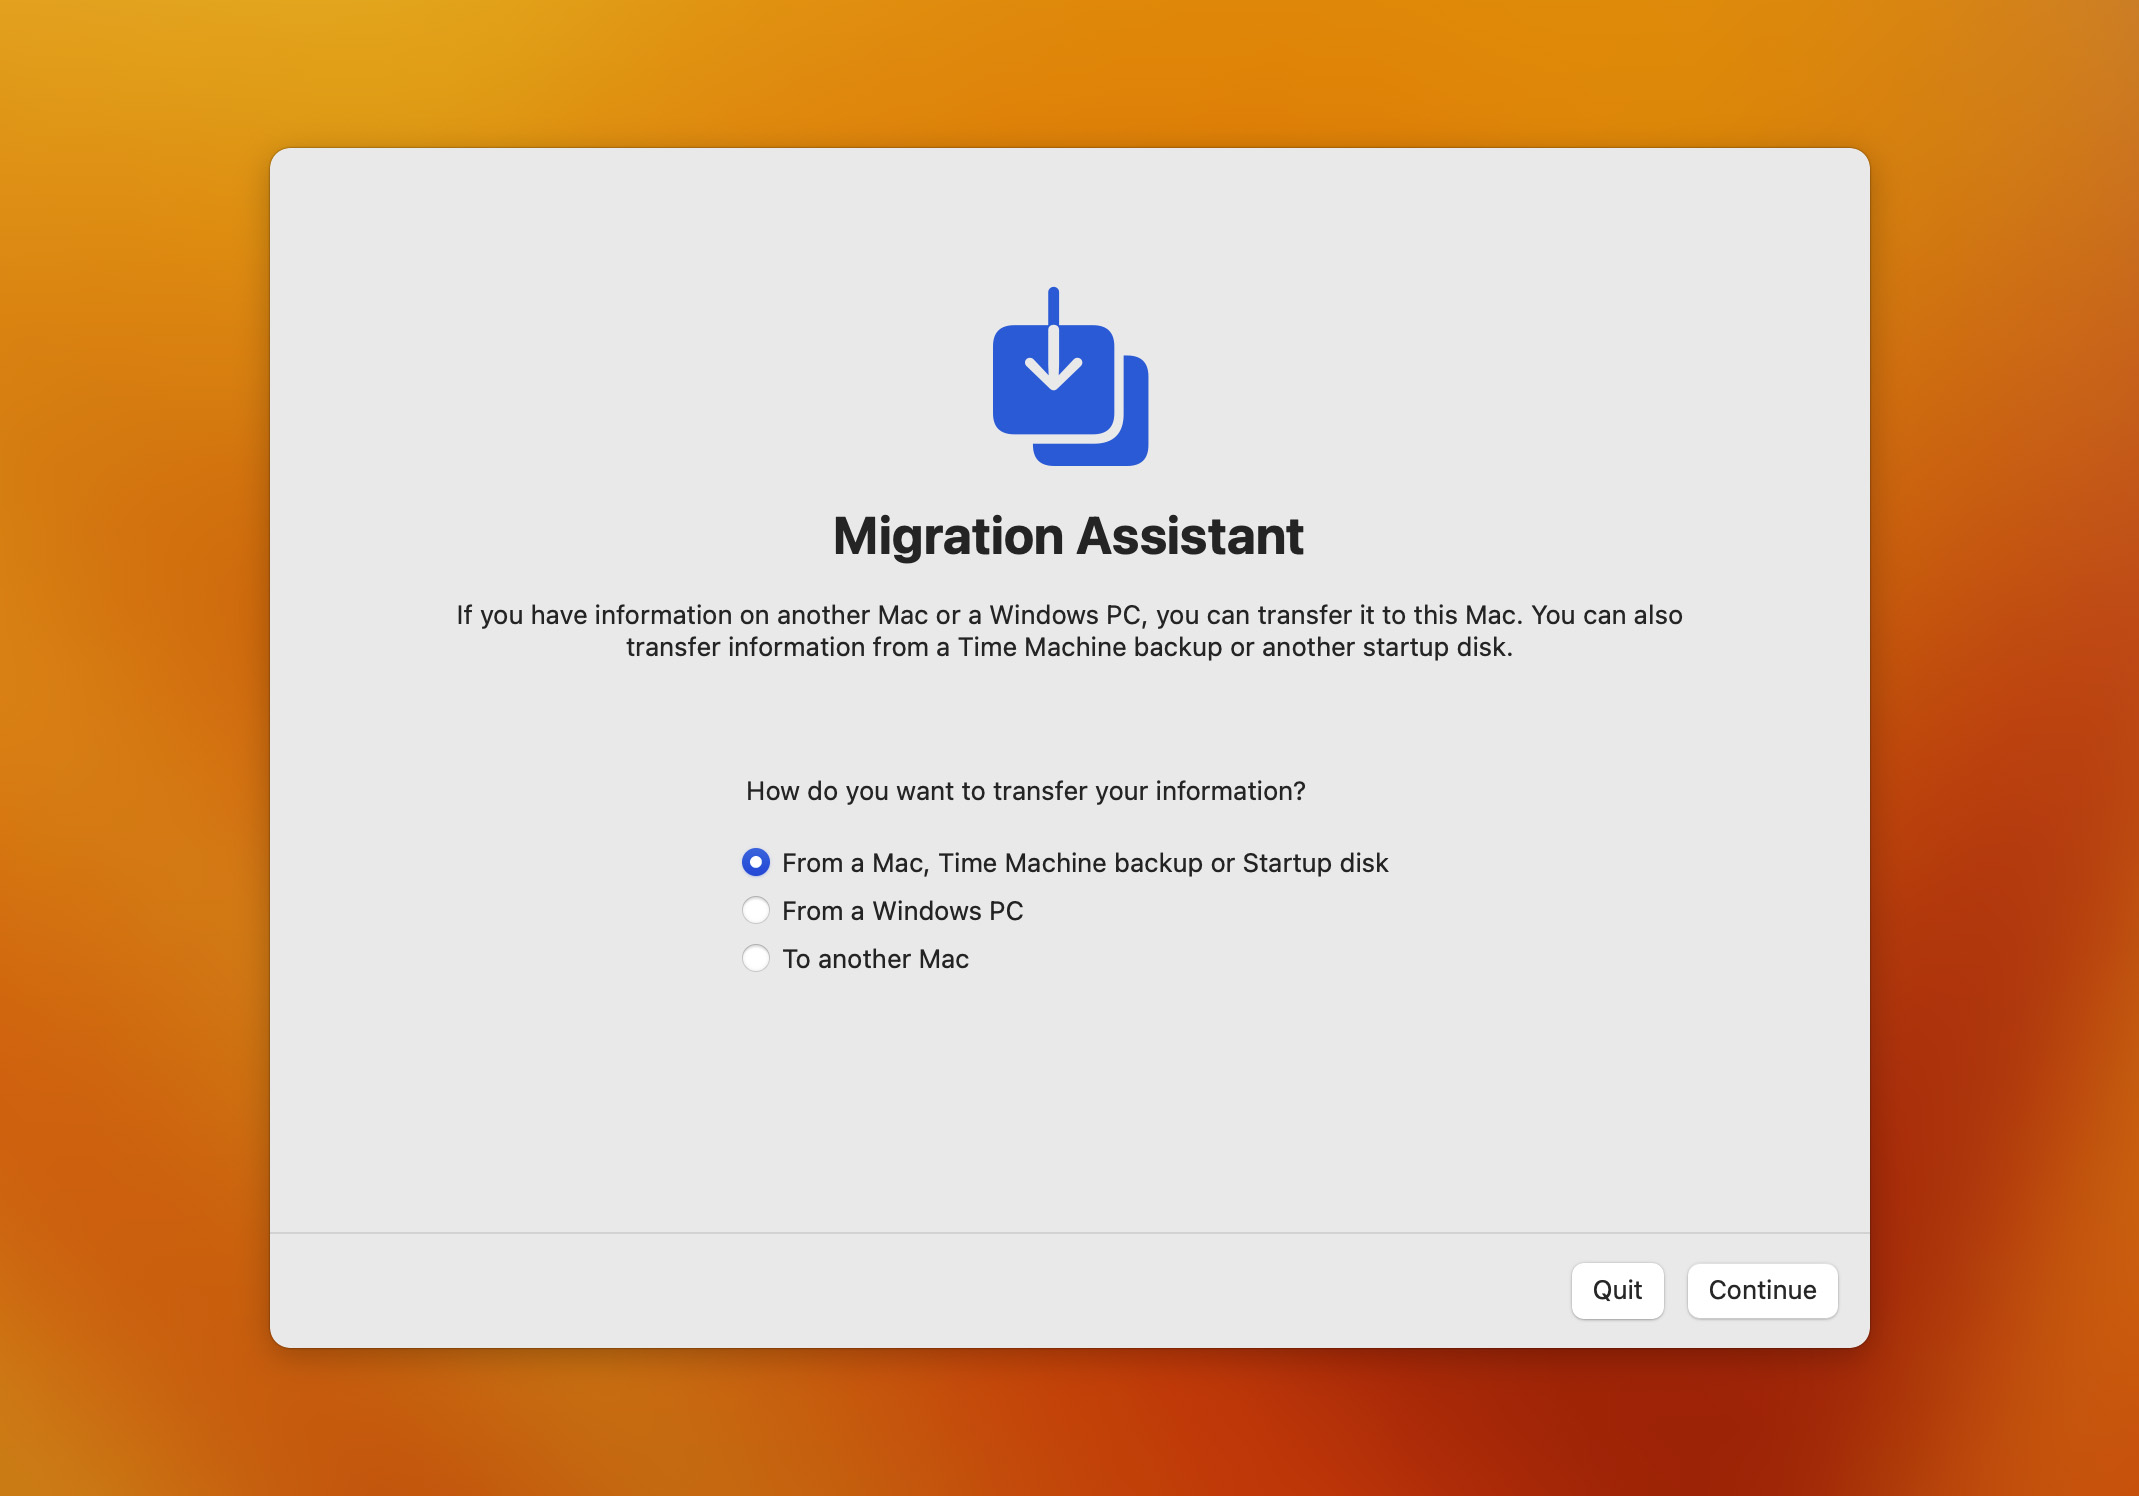
- Select your Time Machine backup drive and click Continue.
- Choose a backup and click Continue.
- Select all data you want to recover and click Continue.
Full Time Machine restores take much more time than selective Time Machine restores, so don’t be surprised if the entire process needs several hours to complete.
Method #3: Open Your Time Machine Backup on Another Mac
When to use: This method comes in handy when you can no longer use your Mac (you’ve lost it, someone has stolen it, it has become damaged) but still have access to your Time Machine backup drive.
A Time Machine backup is really just a collection of folders and files, so you can recover missing data from it using Finder on any Mac—not just the one that was used to create it.
To open a Time Machine backup on another Mac:
- Connect your Time Machine backup drive to the Mac from which you want to access your files.
- Open Finder and select the Time Machine backup drive. If your drive is encrypted, then you will be asked to provide your Time Machine backup password.
- Open the backup folder and go through it to see individual files that have been included in your Time Machine backup. There will be a whole bunch of folders with dates and times. These are the individual incremental Time Machine backups.
- Select the files you want to restore.
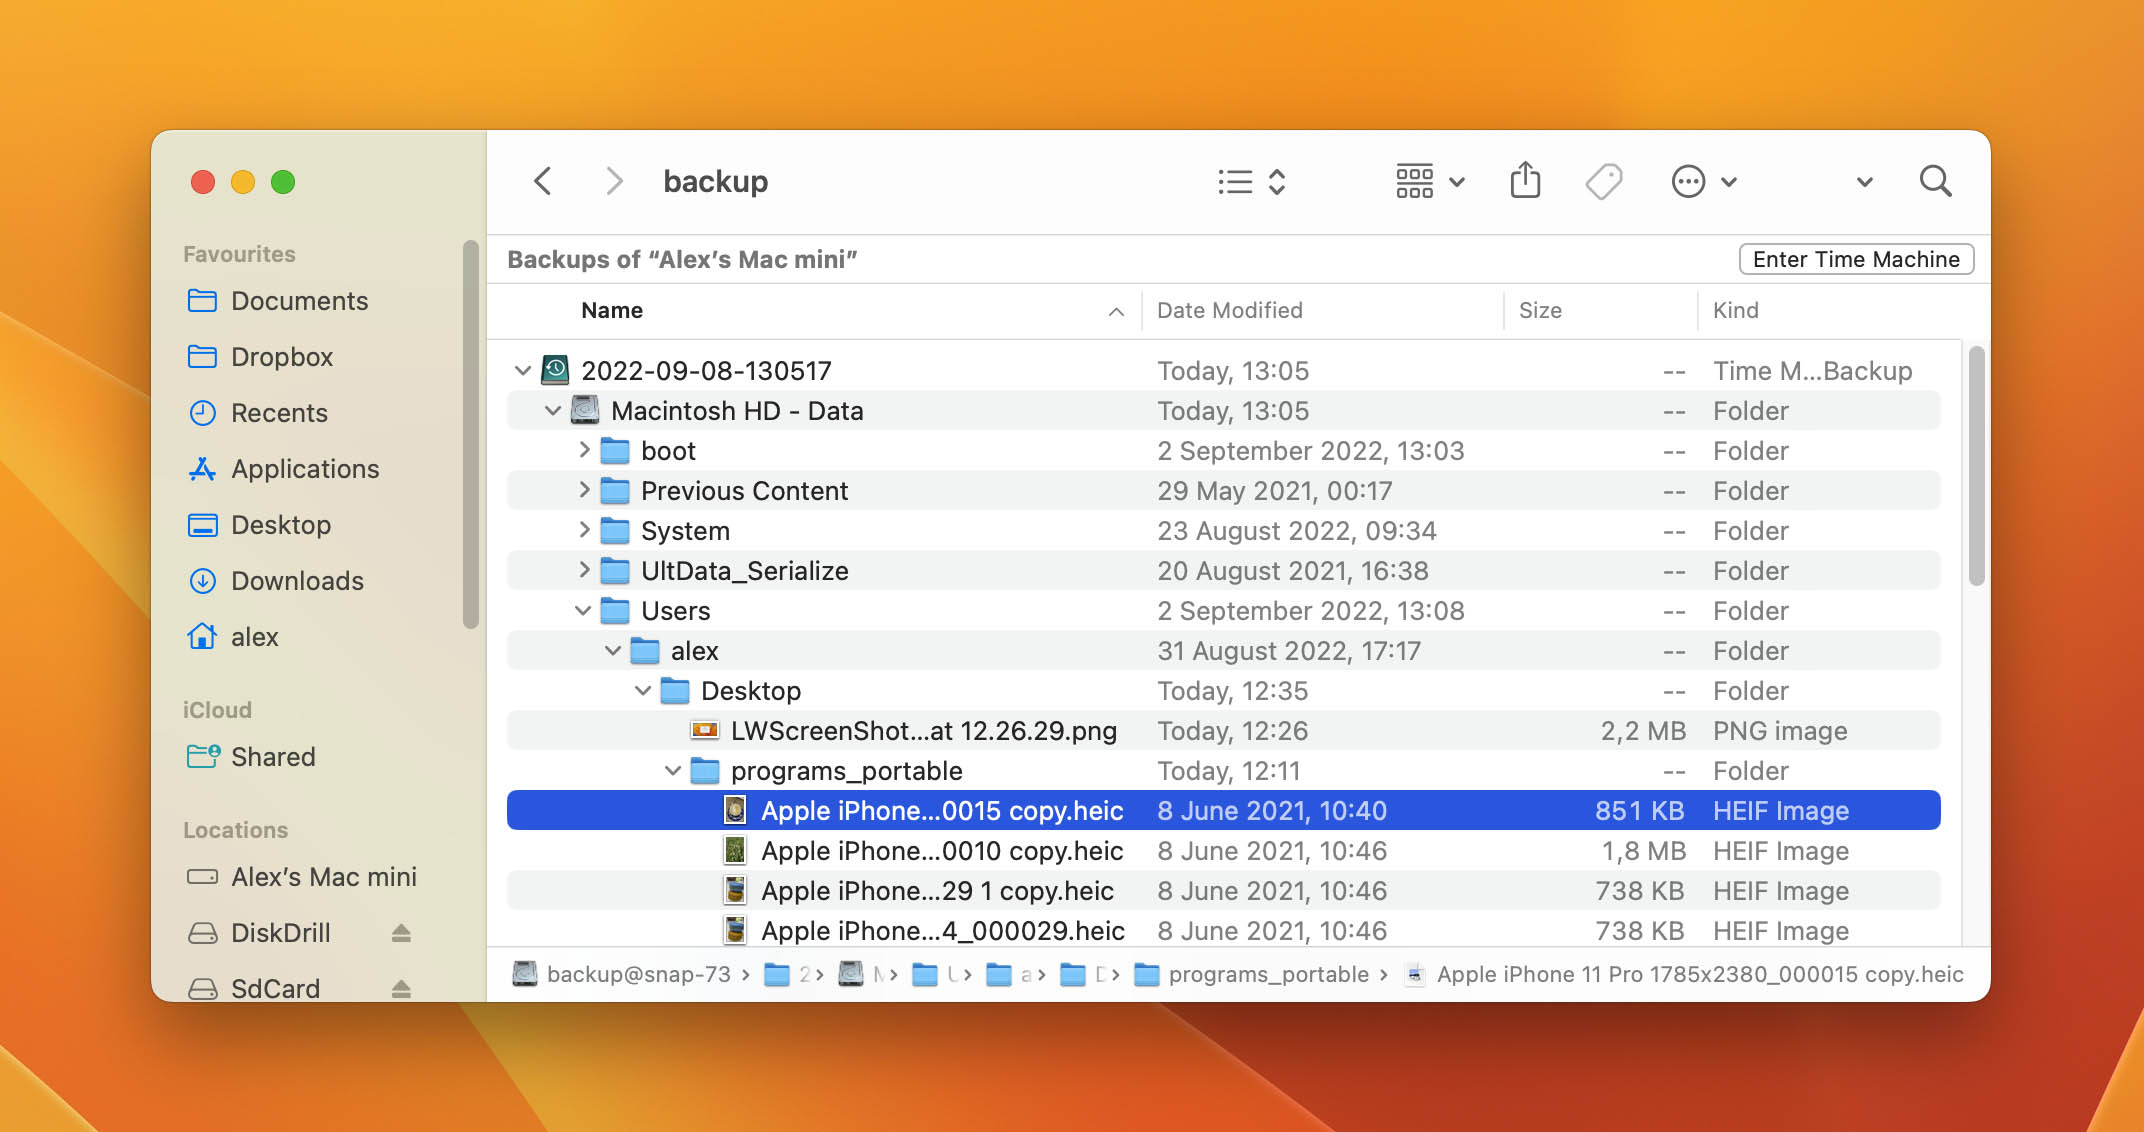
- Move the selected files to a suitable location on the new Mac.
How to Back Up a Mac Without Time Machine
As a backup solution, Time Machine has one major disadvantage: it requires a dedicated backup drive to work. Fortunately, there are other ways to back up a Mac, including Disk Drill.
Disk Drill is a data recovery tool with three useful backup features:
- Byte-to-Byte Backups: You can use Disk Drill to create a complete disk image of any storage device. The image can then be mounted using Disk Drill and recovered just like a regular storage device.
- Guaranteed Recovery: This backup feature monitors the Trash folder and any other specified folder and makes complete copies of files that end up in the monitored folders to guarantee their recovery.
- Recovery Vault: When enabled, Recovery Vault remembers the metadata (filename, file location, etc.) of deleted files to improve data recovery outcomes.
Together, Byte-to-Byte Backups, Guaranteed Recovery, and Recovery Vault provide comprehensive protection against data loss. Just like Time Machine, the three backup features are designed to be as intuitive and efficient. Here’s how easy it is to create a complete byte-to-byte backup:
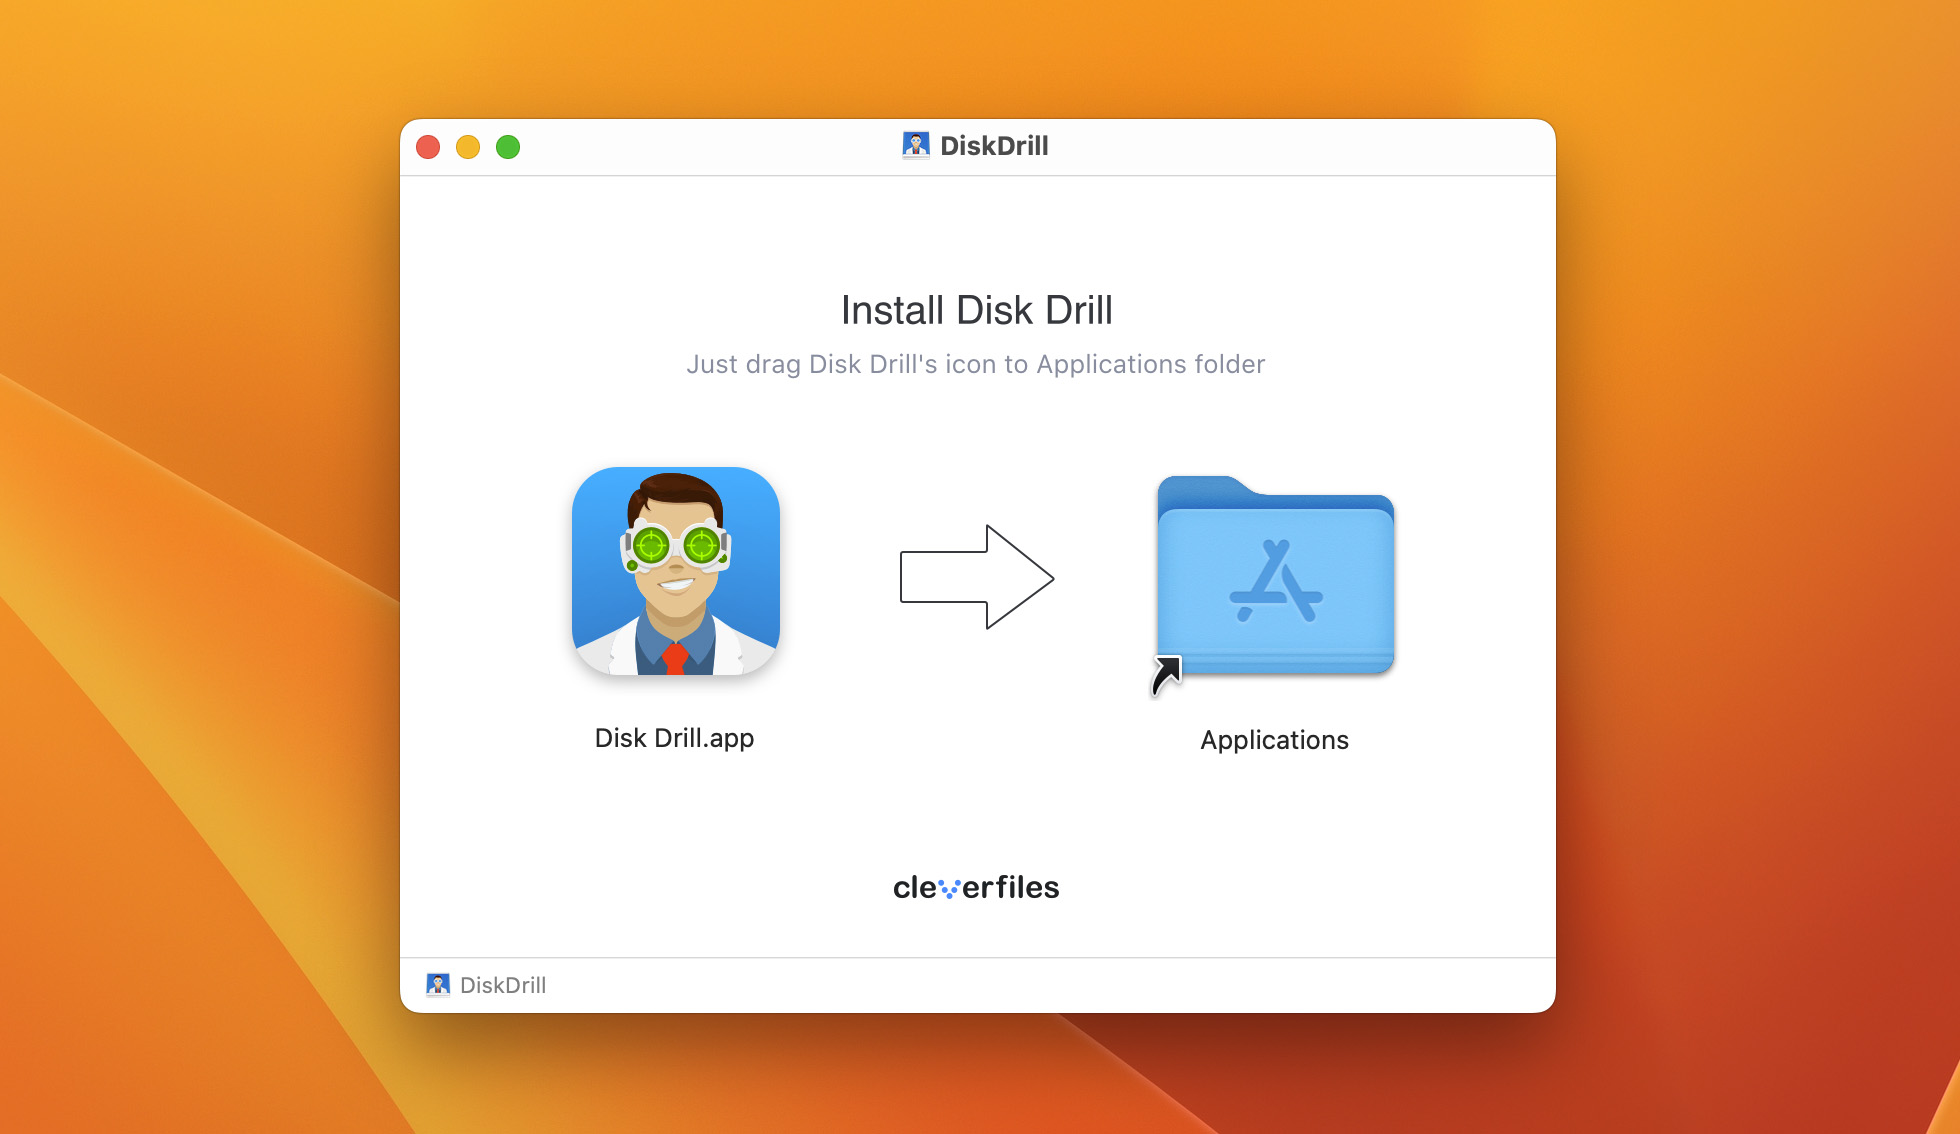
- Download Disk Drill from its official website and install it on your Mac.
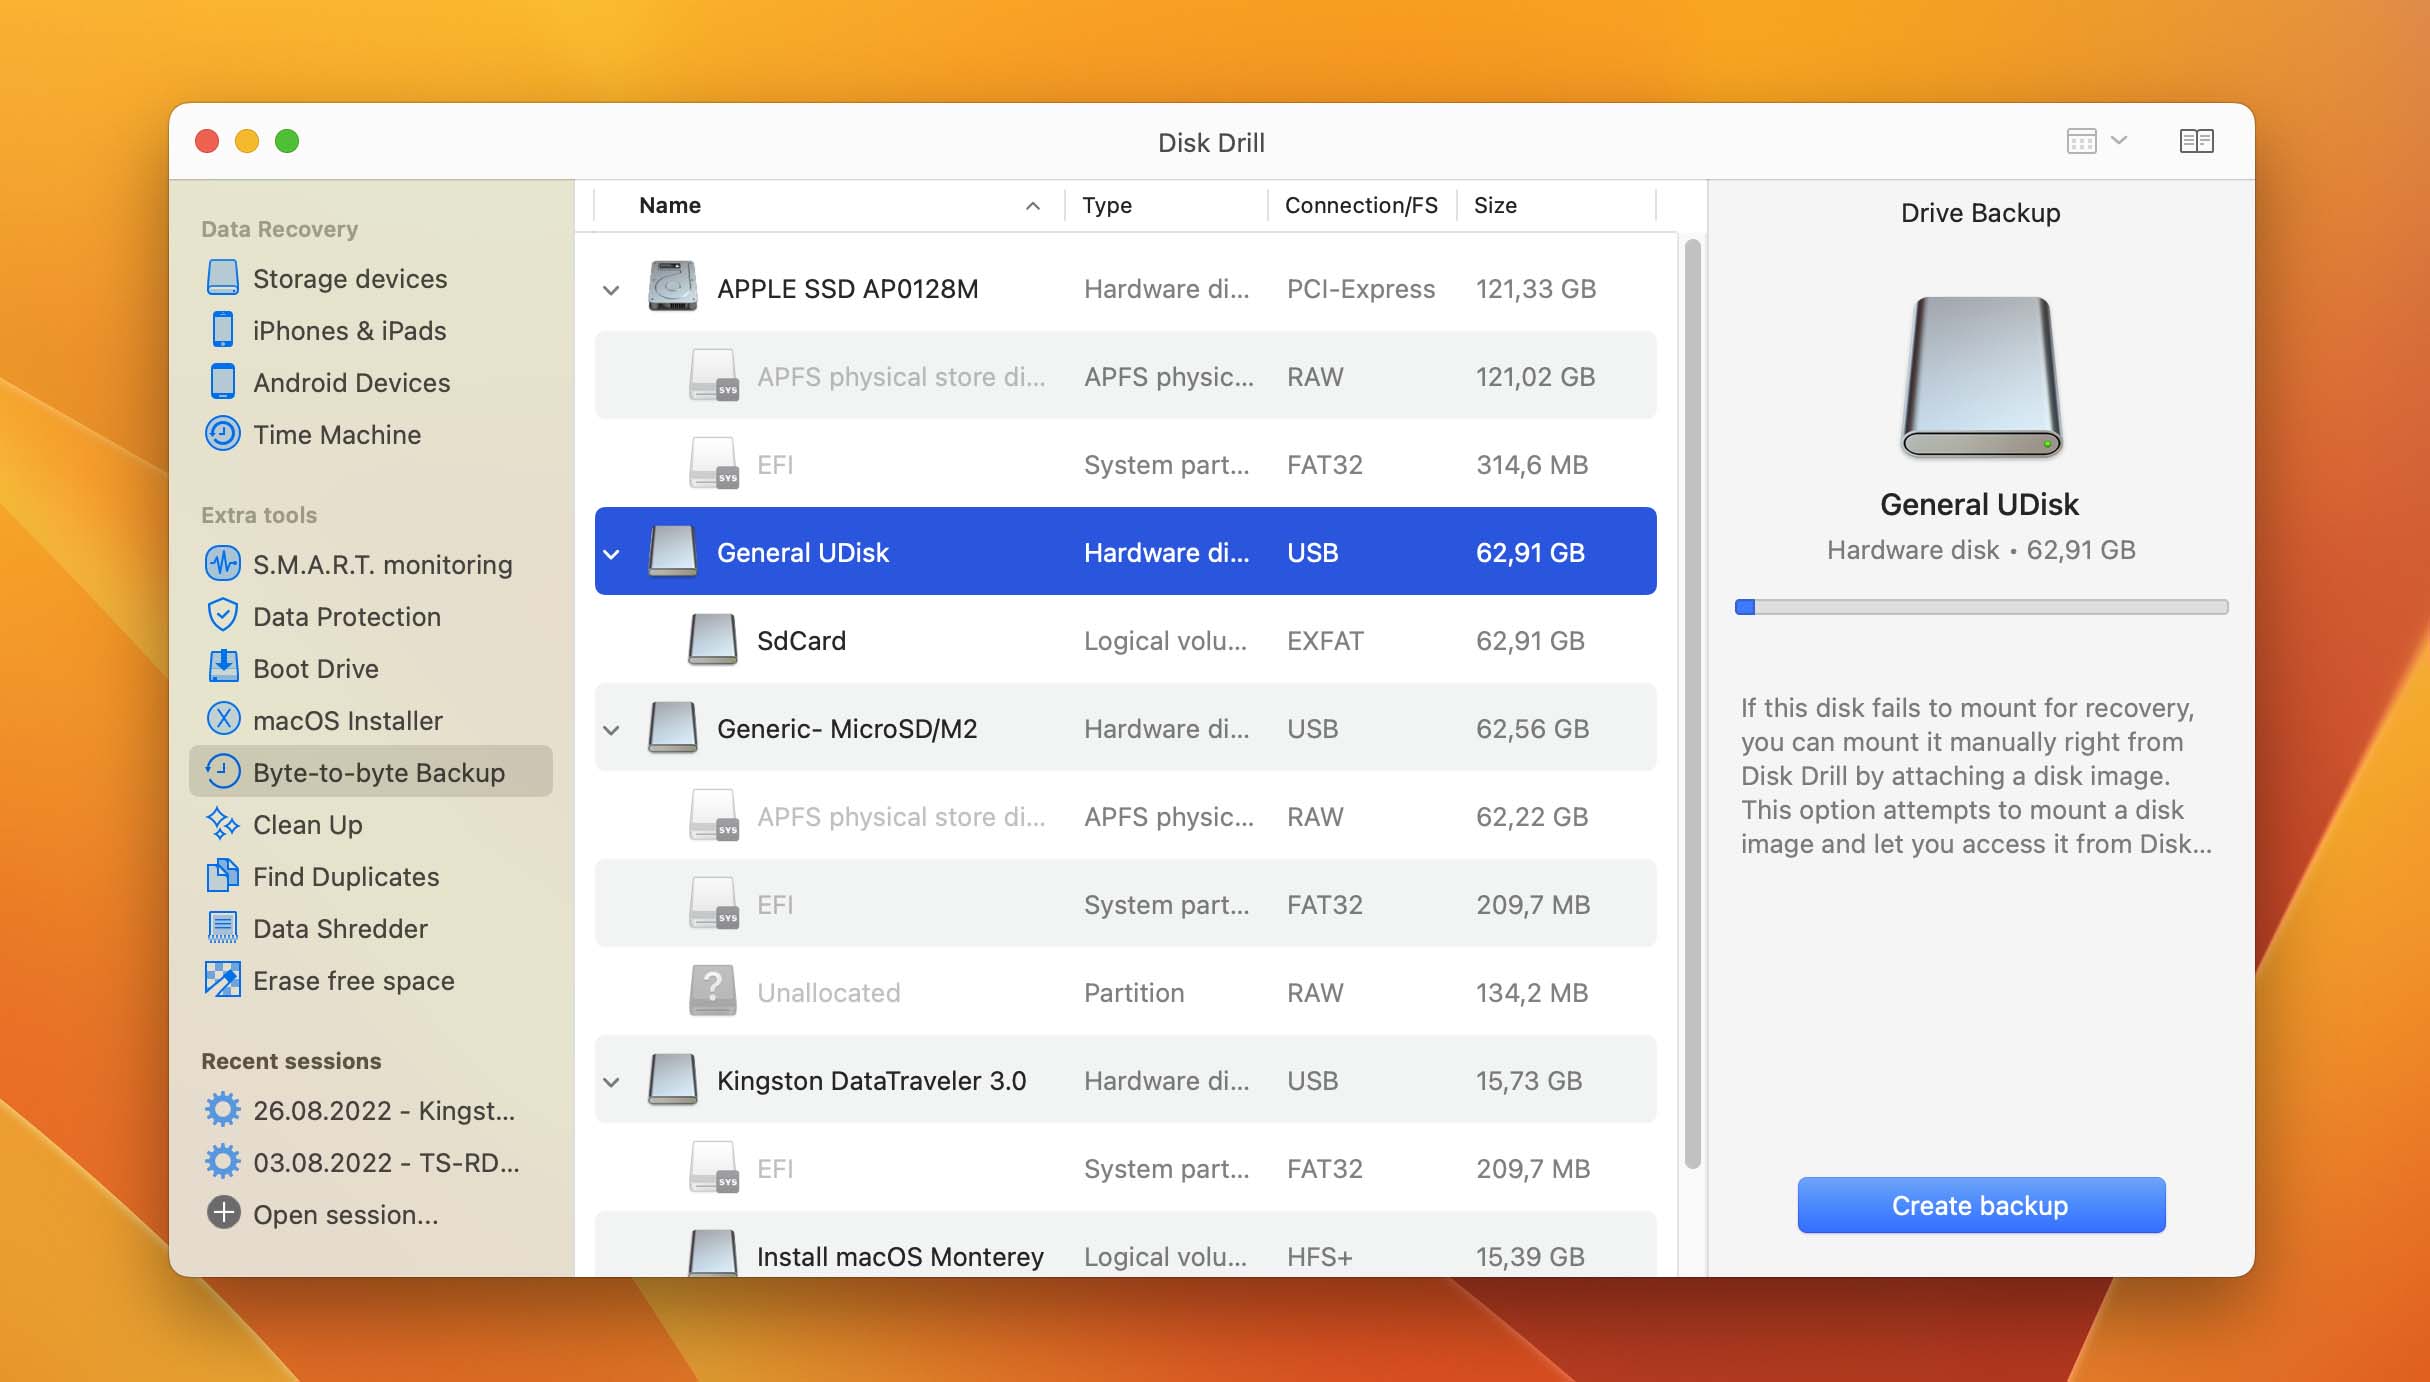
- Launch Disk Drill and select the Byte-to-Byte Backup extra tool.
- Choose the drive you want to backup and click Create backup.
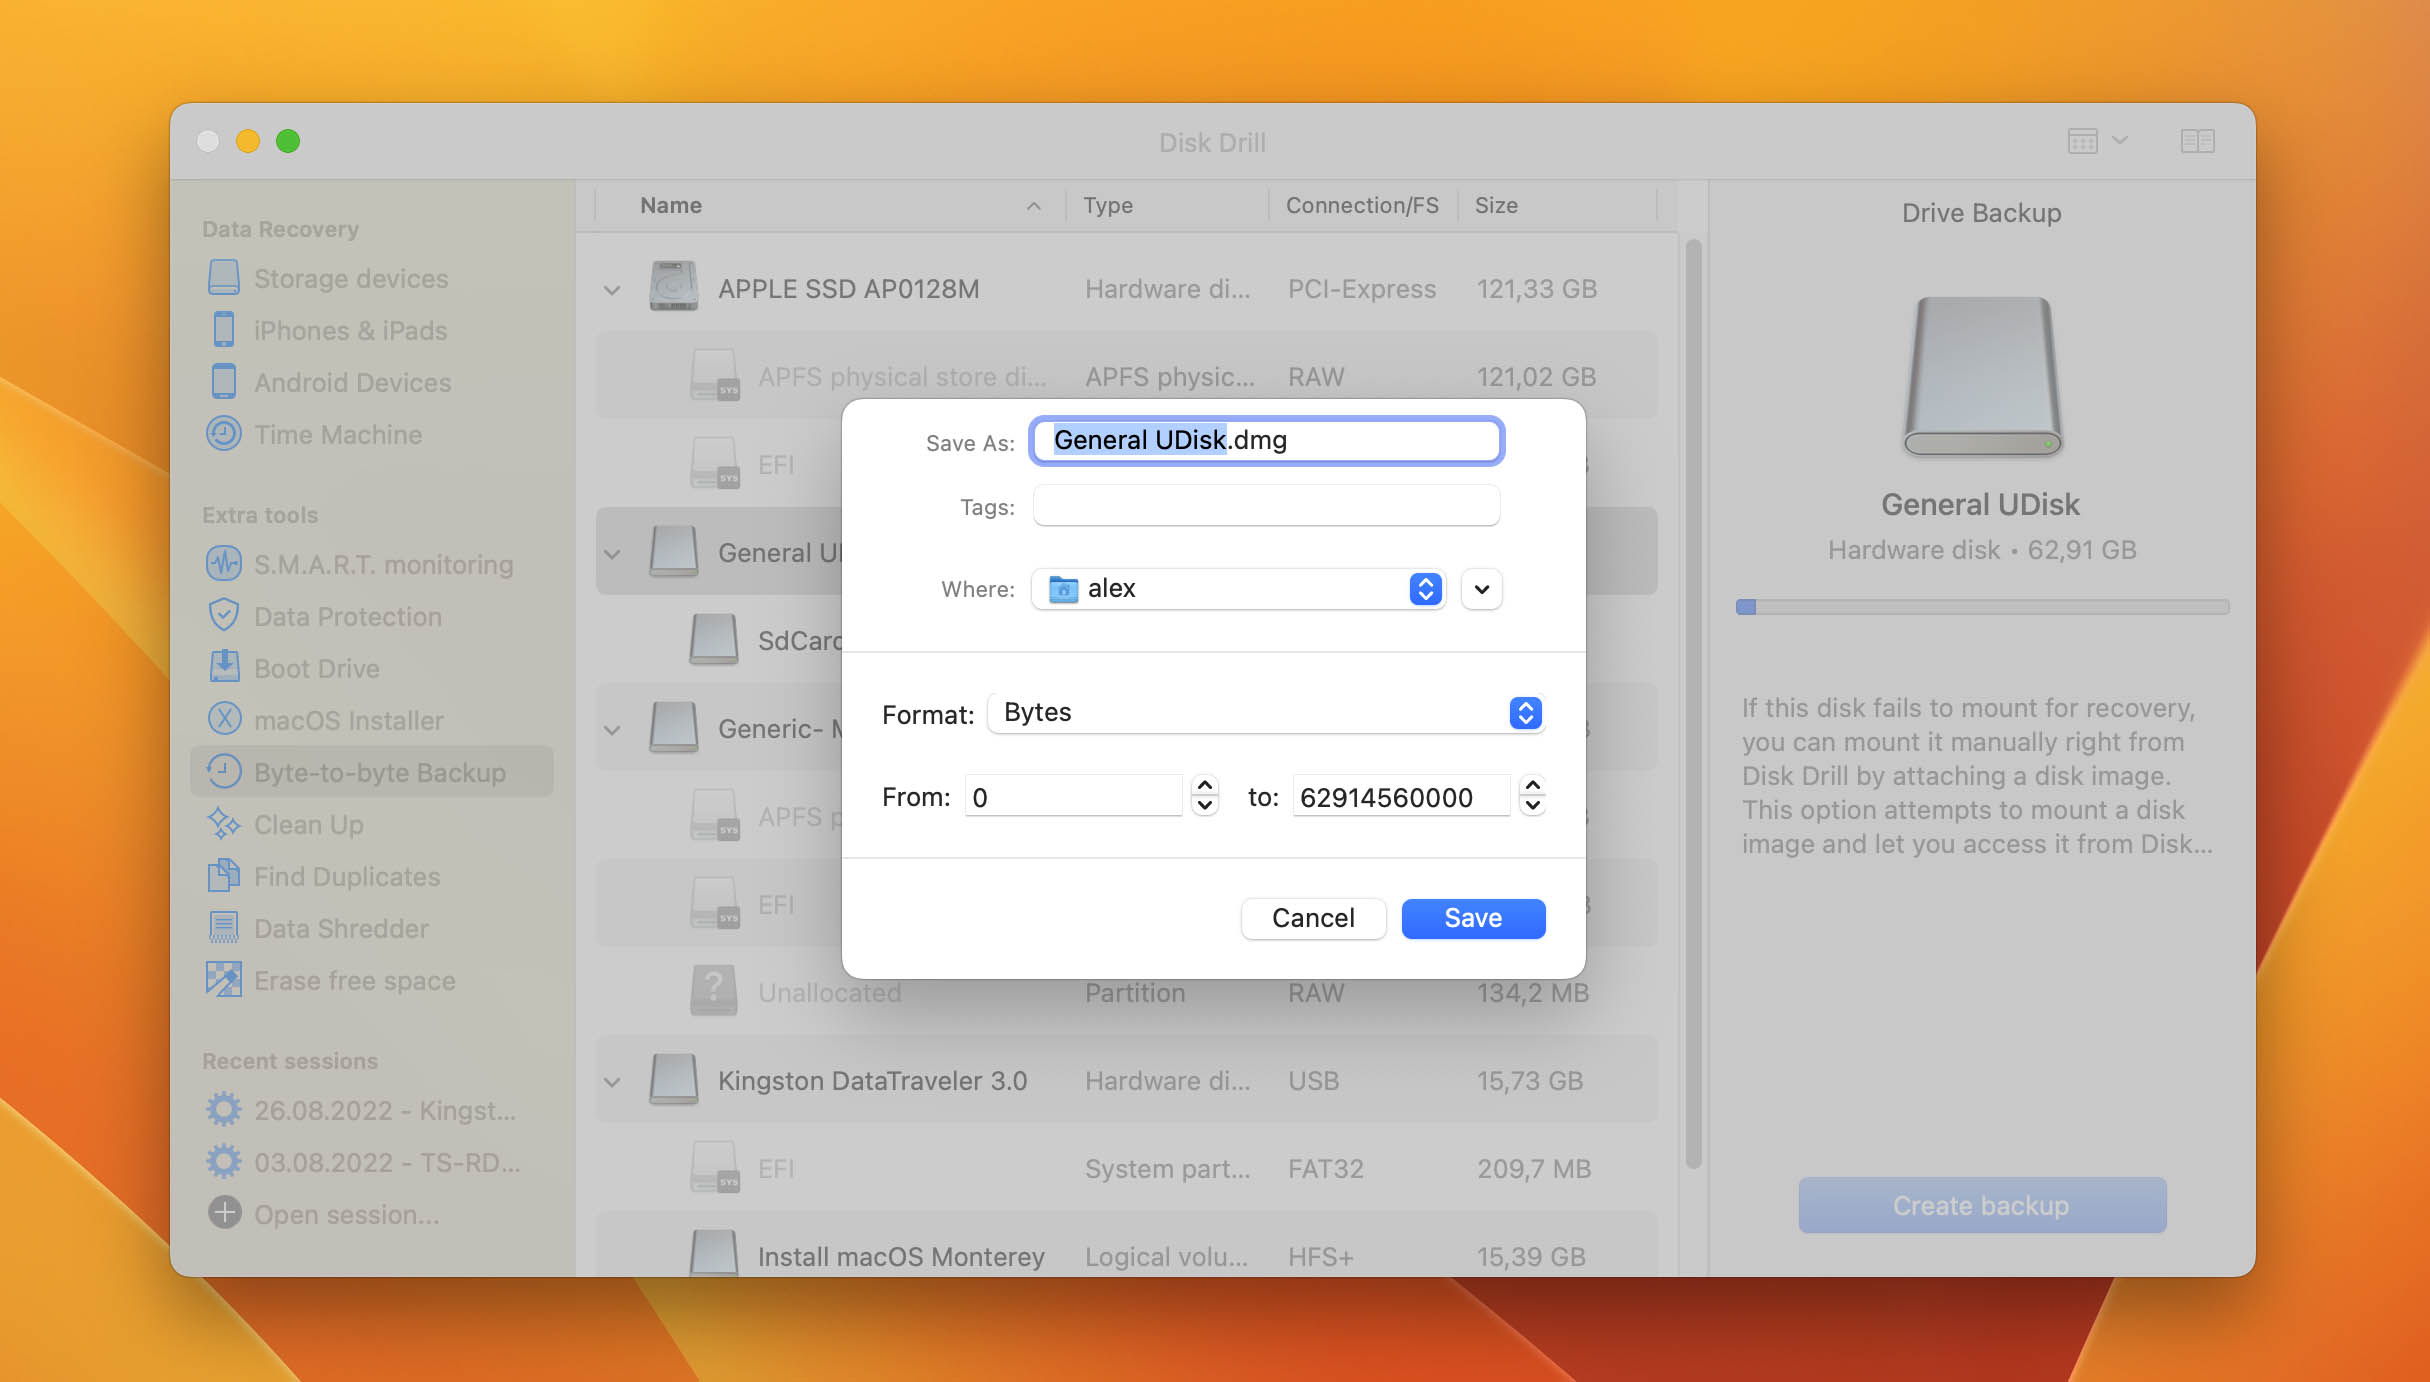
- Name the backup image and select a suitable location for it.
- Click Save to initiate the backup process.
You can pause the backup process at any time, and Disk Drill can even automatically resume it should the drive being backed up become disconnected.
FAQ
There are several ways to access Time Machine backups. You can:
- Press show Spotlight (Command + Space), type “Time Machine”, and select the corresponding option.
- Open Finder, navigate to the Applications folder > Utilities > Time Machine.
- Click the Time Machine icon in the menu bar and select the Browse Time Machine Backups option.
To access Time Machine files from another Mac:
- Connect your Time Machine backup drive to the Mac from which you want to access your files.
- Open Finder and select the Time Machine backup drive.
- Open the backup folder and go through it to see individual files that have been included in your Time Machine backup.
- Select the files you want to restore.
- Move the selected files to a suitable location on the new Mac.
First of all, you need to make sure your Time Machine backup disk is connected to your Mac or the network your Mac is part of. Then, you can open Time Machine preferences and select your backup disk.
Have you selected a file to restore from your Time Machine backup but are unable to get it back because the Restore button is greyed out? Then we recommend you launch Disk Utility (Applications > Utilities) and use the First Aid feature to repair your Time Machine backup drive.
To restore data from Time Machine after a clean install, you need to:
- Finish the installation of macOS.
- Select the Transfer from a Time Machine Backup option in Migration Assistant (Applications > Utilities) and click Continue.
- Select the date and time of the backup you want to recover.
No, Time Machine can restore almost all user files, but it can’t restore the macOS operating system itself because OS files are not included in Time Machine backups.
That depends on the speed of your Time Machine backup drive and the total size of the files you want to restore. You can expect individual files to be restored nearly instantly, while large recoveries can take several hours.
You don’t have to enter Recovery Mode just to restore from Time Machine. You can simply connect your Time Machine backup drive to your Mac and browse its content using Finder.
You can manually copy files from a Time Machine backup by opening the backup drive in Finder. If your backup is encrypted, be ready to provide the correct password first.
Conclusion
Knowing how to restore a Time Machine backup is an essential skill every Mac user should master because it can be the difference between data loss and data recovery. In this article, we’ve explained how to perform a Time Machine selective restore, use Time Machine to restore the entire Mac, and open your Time Machine backup on another Mac. We hope that our instructions will help you get back all the missing files.
