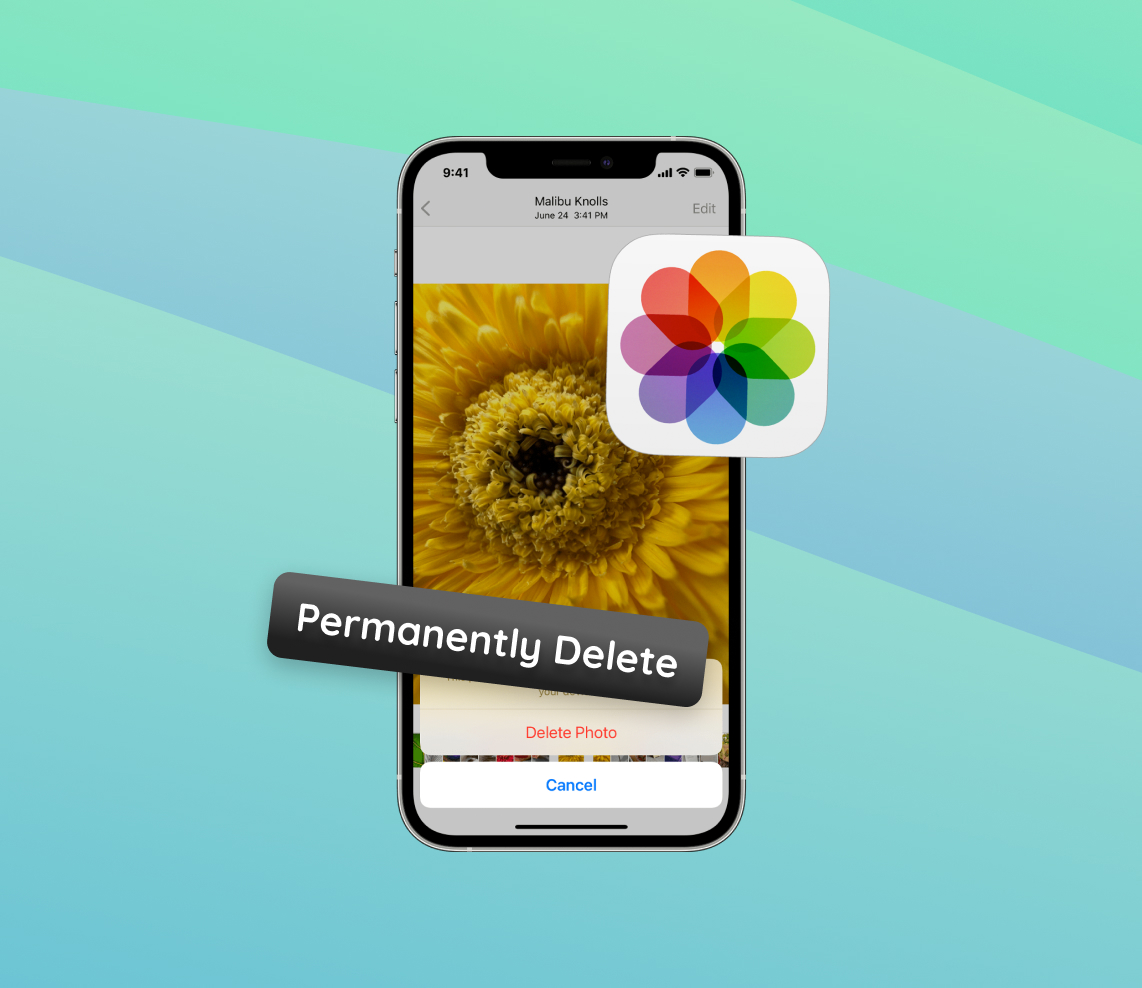
In today’s digital age, smartphones, with iPhones at the forefront, play an indispensable role in capturing our experiences and memories through pictures. Apart from photos, users store a myriad of files on their iPhones, making data management crucial. As a result, understanding the dynamics of photo management on these devices becomes paramount. Yet, it’s not uncommon for users to grapple with the seemingly straightforward task of deleting photos. This article dives deep into the intricacies of photo deletion on iPhones, demystifying the processes and dispelling prevalent myths.
Why Users Often Struggle with Permanently Deleting iPhone Photos
From photos to apps, various things occupy the storage space on your iPhone, making regular management essential. With smartphones becoming an integral part of our lives, it’s no surprise that users quickly snap pics, store, and delete countless images. However, for iPhone users, the process of ensuring photos are genuinely erased has become a topic of concern and confusion. The iPhone’s intricate built-in mechanisms aim to protect users from accidental data loss, but they inadvertently give rise to misconceptions about how to permanently delete photos from iPhone.
One widespread belief is that erasing a photo from the main gallery ensures its complete removal. Yet, when you delete a photo on iPhone, it merely relocates to the “Recently Deleted” album. Here, it resides for up to 30 days before it’s automatically eradicated. While this feature acts as a safety net against unintentional deletions, it can mislead users into thinking they managed to completely delete photos from iPhone.
Adding to the complexity, the integration of iCloud Photo Library means that these ‘deleted’ photos remain visible in the “Recently Deleted” album across all devices linked with the same Apple ID. This synchronization, while ensuring a seamless experience, can perpetuate the misunderstanding that images aren’t fully deleted from the iPhone.
- ? The “Recently Deleted” safety net can lead to confusion.
- ☁️ iCloud synchronization ensures ‘deleted’ photos are visible across devices, furthering misconceptions.
- ? Users need a clear understanding of iPhone’s data recovery mechanisms to manage their photos effectively.
In summary, the iPhone’s sophisticated features to prevent undesired photo losses can sometimes be a double-edged sword. It provides a safety layer, yet it also demands a more nuanced understanding from users eager to manage their digital memories accurately.
Steps to Permanently Delete Photos from iPhone
Ensuring that your photos are completely erased from your iPhone provides not only peace of mind but also helps in freeing up storage. While the process is straightforward, it requires a few specific steps, especially given the iPhone’s safety mechanisms. Whether you’re a tech novice or a seasoned iPhone user, the following guide will help you understand how to permanently delete photos from iPhone with clarity.
Step-by-Step Guide:
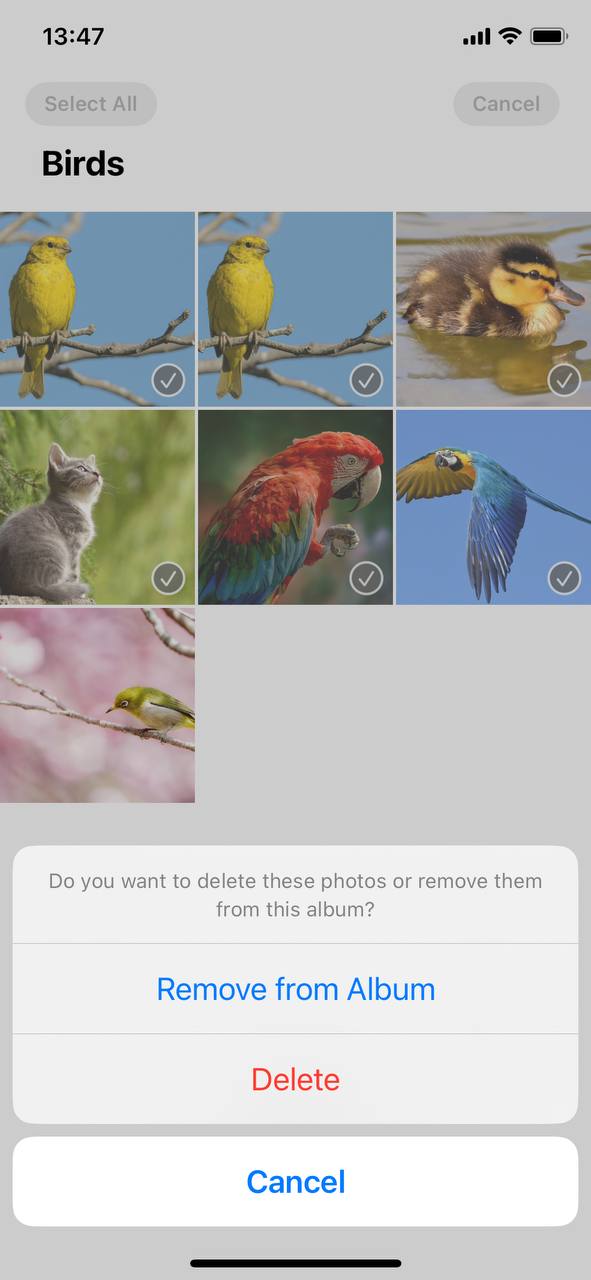
- Delete Photos from Main Gallery: Navigate to your Photos app and select the images you wish to remove. Tap on the trash icon located at the bottom-right corner and confirm the deletion. This action doesn’t delete photos from iPhone permanently; it moves them to a temporary holding place.
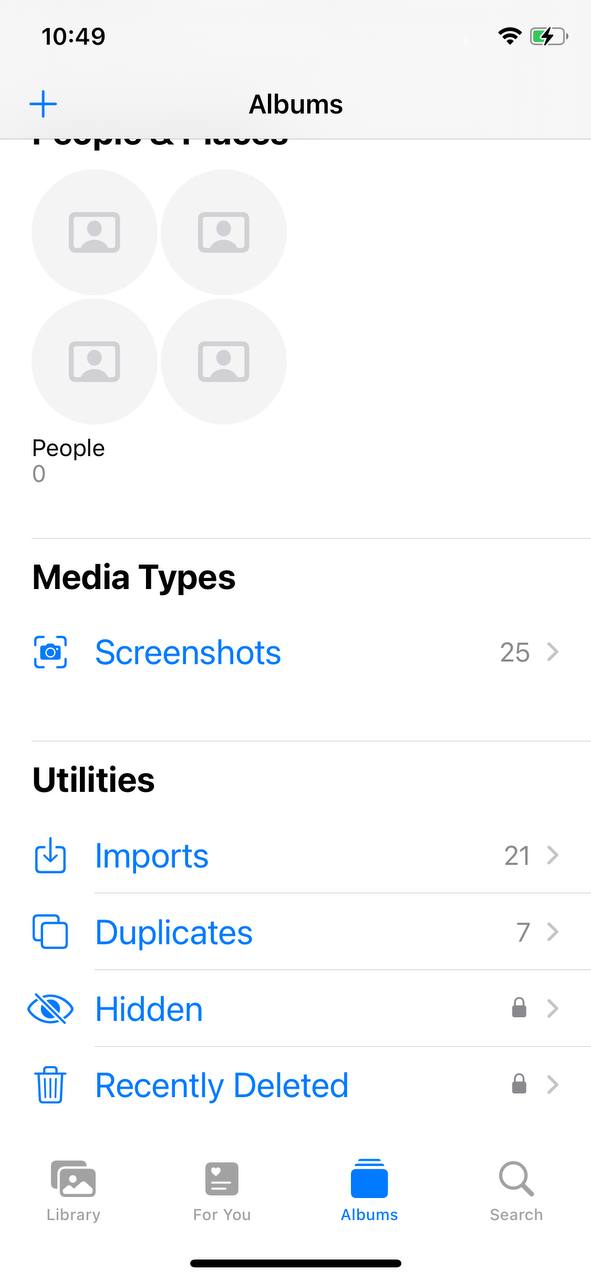
- Access the ‘Recently Deleted’ Album: From your Photos app, go to the ‘Albums’ tab and scroll down. You’ll find an album named ‘Recently Deleted’. This is where your deleted photos reside for up to 30 days.
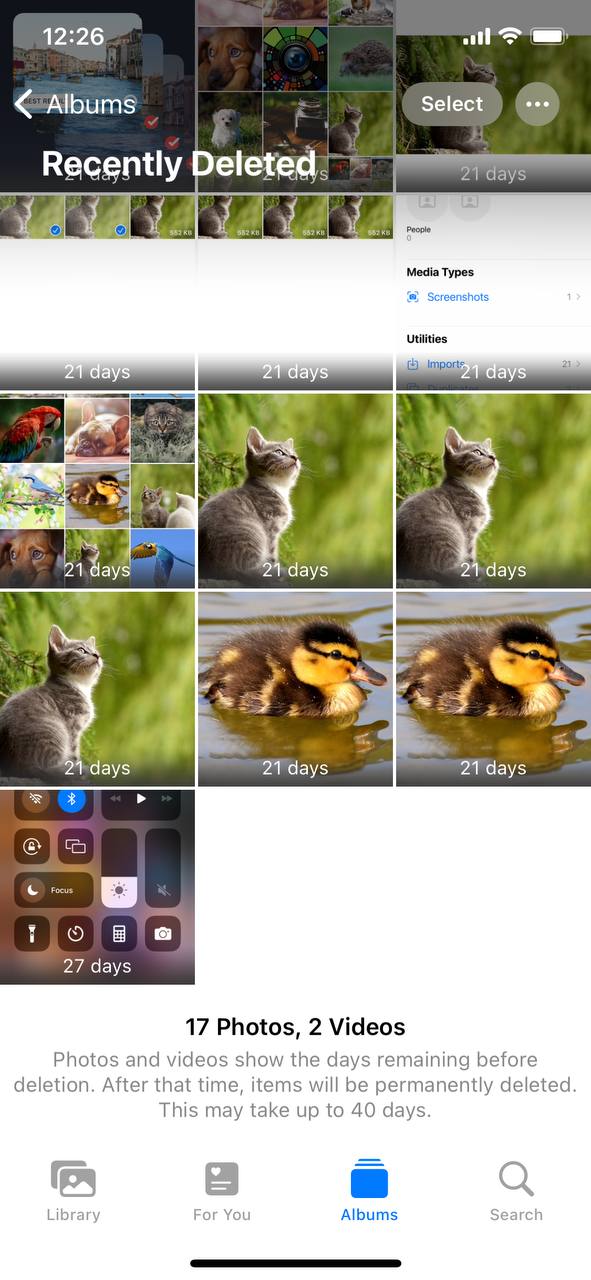
- Permanently Remove Photos from the ‘Recently Deleted’ Album: Open the ‘Recently Deleted’ album, and you’ll see your photos along with the number of days left before they’re automatically deleted. To completely delete photos from iPhone, select the photos and tap on ‘Delete’ or choose ‘Delete All’ to remove everything in the album.
- Ensure iCloud Sync is Handled: If you use iCloud Photo Library, the photos will also be in the ‘Recently Deleted’ album across all devices connected to the same Apple ID. Ensure you delete them from other devices as well if needed.

While these steps effectively remove photos from the device, it’s essential to remember that if you’ve backed up your iPhone to iTunes or iCloud before deleting photos, the images might still be present in the backups. For users aiming to fully delete photos from iPhone and all associated backups, additional steps may be needed to manage and modify backup data.
By carefully following the above steps, users can be confident in their ability to manage their photo storage and privacy on their iPhones. For a more comprehensive understanding of photo management on iOS, Apple’s official guide offers in-depth insights.
Ensuring Photos are Fully Deleted and Don’t Come Back
The act of deleting a photo from your iPhone’s main gallery is just the start of getting rid of it completely. With multiple layers of backup and synchronization, ensuring that an image is permanently deleted from iPhone can be slightly more intricate than initially thought. Moreover, various third-party apps might also sync and save your photos, leading to their unexpected reappearance.
Backup Layers and Their Management
Here are the main areas to consider when aiming to completely delete photos from iPhone:
iCloud Photo Library:
- Photos and videos are stored directly in iCloud. Deleting a photo from your iPhone also deletes it from iCloud and all other devices connected to that iCloud Photo Library.
- If you want to keep the photo in iCloud but remove it from your device, disable iCloud Photo Library for that device.
iTunes Backups:
- Connect the iPhone to your computer.
- Open iTunes oSocial media platforms like Facebook also have settings that might sync with your iPhone’s photo library. r Finder, locate your device, and choose ‘Manage Backups’.
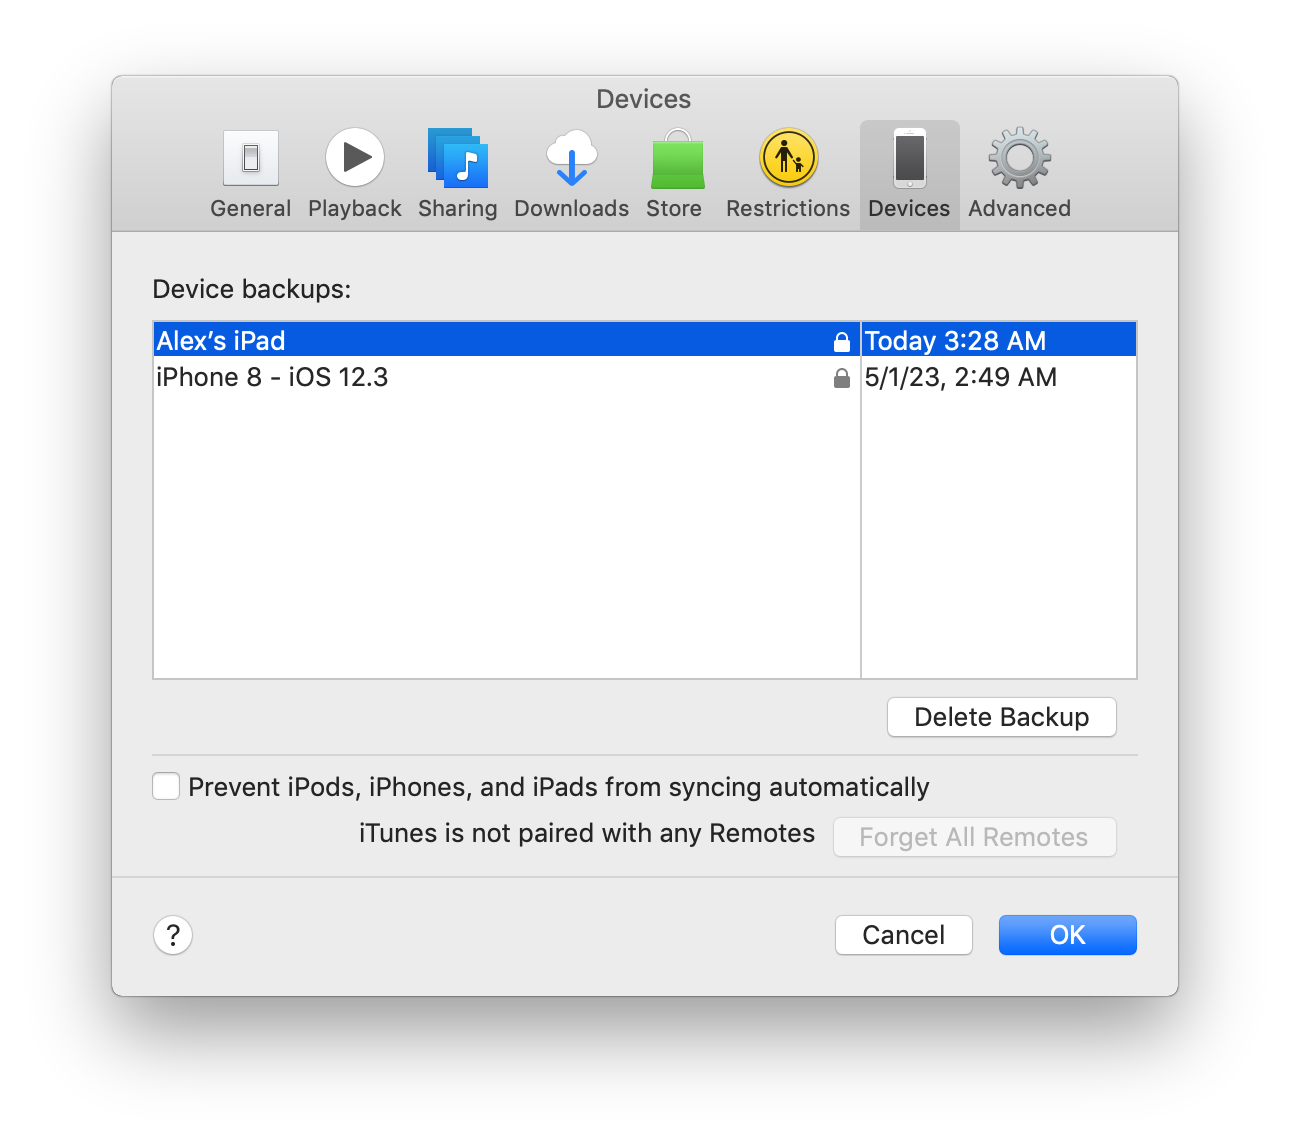 Delete any backups containing the photos you wish to erase.
- Remember, subsequent backups won’t contain those photos if they’ve been permanently deleted from iPhone.
Third-Party Apps and Their Syncing Mechanisms
Several apps might sync and store your photos. Here’s a list of popular ones and brief management tips:
- Google Photos: If you use Google Photos for backup, remember that deleting a photo from iPhone doesn’t delete it from the Google Photos cloud. Ensure you open the app and delete photos from there as well. Google’s guide can be useful for this.
- Dropbox: If you’ve activated camera uploads in Dropbox, it might have saved photos you’ve deleted from your iPhone. Open the app and navigate to ‘Photos’ to manage and delete as necessary.
- Amazon Prime Photos: Prime members using this service should open the app and manually delete photos from its cloud to ensure they don’t reappear on synced devices.
- Other Apps: Always check any photo-sharing or storage apps you’ve installed. Examples include Flickr, OneDrive, and Snapseed. Regularly review their settings and storage to ensure unwanted photos aren’t lingering.
In conclusion, fully erasing items, especially photos, from your iPhone ecosystem requires a multi-pronged approach. By understanding and managing both internal backups and third-party applications, you can confidently control your digital photo trail.
Prevention and Maintenance: Keeping Your iPhone Photo-Free
For some iPhone users, maintaining a clean and clutter-free photo library is essential. This not only helps in managing storage effectively but also ensures that once photos are permanently deleted from iPhone, they remain that way. Here’s a table summarizing the key measures you can take:
| Action | Details |
| ? Monitor Storage | Go to Settings > General > [iPhone] Storage for a breakdown of space consumption. |
| ⚙️ Optimize Storage | Use ‘Optimize iPhone Storage’ to keep smaller-sized photos on the device and full-resolution versions in iCloud. More on this. |
| ? Review Recommendations | Heed iPhone’s advice on enabling iCloud Photo Library or reviewing large attachments. |
| ☁️ iCloud Backups | Enable iCloud Photo Library and choose ‘Optimize iPhone Storage’ to backup photos without using much device space. |
| ? Physical Backups | Connect iPhone to a computer and use iTunes or Finder for backups. |
| ?️ Empty ‘Recently Deleted’ | Ensure the ‘Recently Deleted’ album in Photos is cleared. Photos stay there for 30 days otherwise. |
| ? Check iCloud & Cloud Services | Regularly review iCloud and other cloud storage to ensure no deleted photos remain. |
| ? Third-Party Apps | Understand backup and sync settings of any third-party photo apps to avoid unintentional restores. |
With these measures in place, you can ensure your iPhone remains photo-free and organized, according to your preferences.
Conclusion
The iPhone, renowned for its user-friendly interface and advanced features, still presents challenges in areas as fundamental as photo management. While the built-in safety mechanisms aim to prevent accidental data losses, they often sow seeds of confusion among users. For many, the expectation that deleting a photo leads to its immediate and permanent removal is a natural one. However, as we’ve seen, the reality is more layered, with photos lingering in ‘Recently Deleted’ folders and cloud backups. Familiarizing oneself with these nuances is not just about regaining control over one’s digital space but also about understanding the broader implications of data management in our interconnected world.
FAQ
Photos in the ‘Recently Deleted’ folder are typically kept for 30 days. After that duration, they are permanently deleted. It gives users a chance to recover any mistakenly deleted photos.
Once a photo is permanently deleted from your iPhone and the ‘Recently Deleted’ folder, it cannot be recovered from the device itself. However, if you have backed up your iPhone to iCloud or iTunes before deleting the photo, you can restore your phone from that backup to retrieve the photo.
If you’re using Google Photos to back up your iPhone photos, then the behavior depends on your settings. If the “Back up & sync” feature is turned on, deleting a photo from your iPhone will also delete it from Google Photos. However, if you’ve turned off the sync or if you uploaded the photo to Google Photos manually, then deleting it from your iPhone won’t affect its presence on Google Photos.
There could be several reasons for this:
- If your photos are backed up to iCloud, they might be redownloaded to your device.
- Photos might be synced from another device using the same Apple ID.
- Third-party apps with access to your photos might be causing a sync issue. Ensure to check the settings in any cloud storage or photo-sharing apps you’re using to identify the cause.
