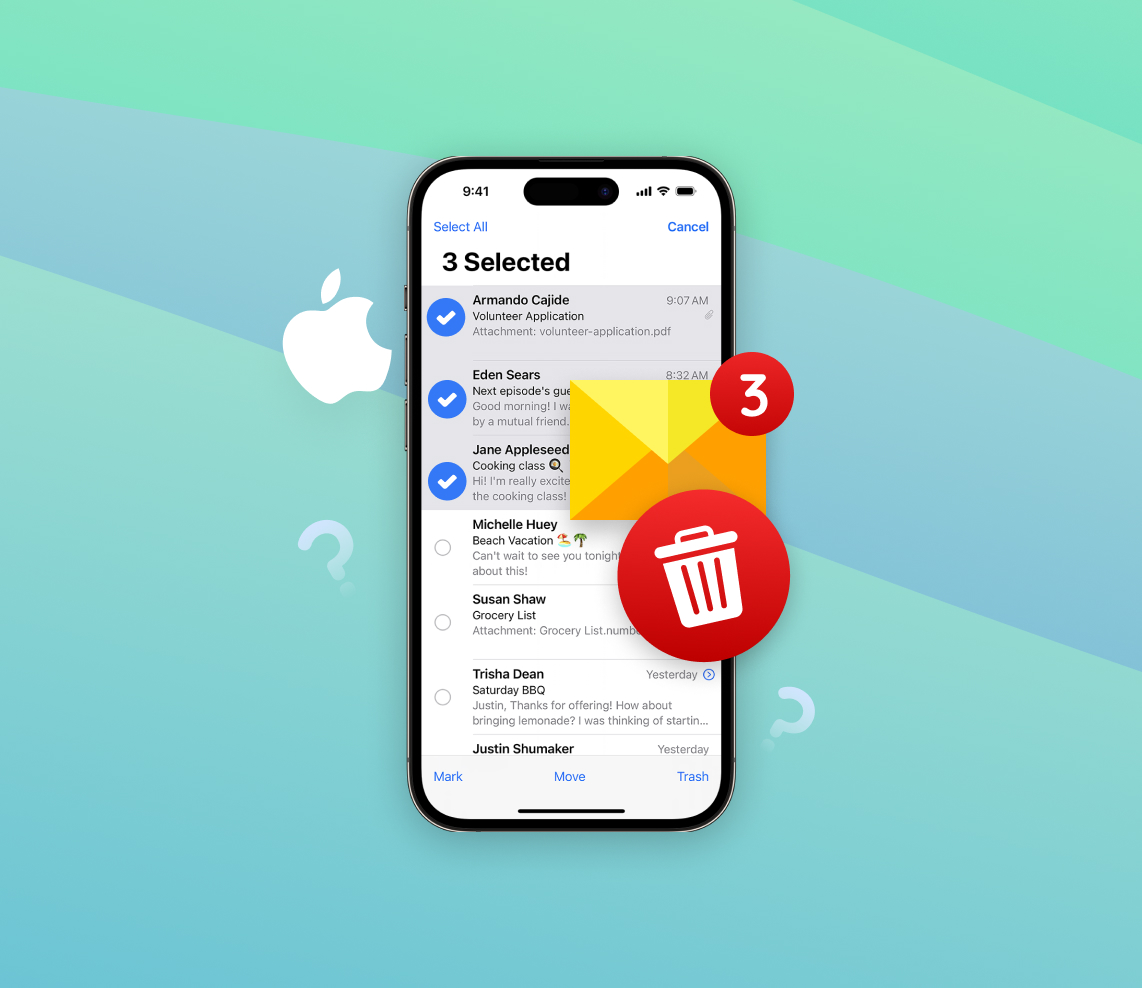
The ability to effectively manage emails is a quintessential skill in today’s digital age. With smartphones like the iPhone being our primary communication tool, understanding the intricacies of email management is crucial. This article delves deep into the world of email storage on iPhones, its impact, and offers step-by-step guidance on efficient email decluttering.
How iPhones Store Emails
The iPhone, like other smartphones, utilizes a combination of hardware and software to manage and store emails efficiently. Given the volume of communication, we partake in through emails, understanding how email storage impacts both the device’s performance and the user’s experience is paramount. Let’s explore the behind-the-scenes workings of email storage on an iPhone, and in the course of this discussion, pave the way to our primary focus: mastering the techniques to delete emails in bulk on iPhone.
Email Storage and iPhone Performance
Every time an email is received or sent from an iPhone, it’s stored in a dedicated email storage section within the device’s memory. Emails, especially those with large attachments, can quickly take up storage space. Here’s how this storage affects the device:
| Impact | Description |
| ? Performance Degradation | As storage gets filled up, the device may begin to slow down. The reason is twofold: not only is there less room for other tasks, but the device also has to work harder to manage, index, and retrieve information from a nearly full memory. |
| ? Decreased Battery Life | Continually syncing and downloading large volumes of emails, especially when storage is nearing its capacity, can drain the battery at a faster rate. |
| ❌ Application Conflicts | If the email application is constantly battling for storage with other apps, it may occasionally freeze or crash. |
The User Experience and Email Storage
From a user’s perspective, a cluttered mailbox can significantly hinder productivity and enjoyment. Searching for a specific email among thousands of unread ones can be a daunting task. Moreover, notifications for new emails might be overlooked or dismissed when the inbox is overwhelmed. This calls for an effective solution to delete multiple emails on iPhone for a smoother experience.
How to Delete Multiple Emails on iPhone: Step-by-Step Guide
Clearing out your inbox is a great way to free up storage space and enhance your device’s performance. If you’re looking for ways to delete emails in bulk on iPhone, this step-by-step guide is for you. Just follow these simple instructions, and you’ll have a decluttered inbox in no time.
Let’s dive into the step-by-step guide to efficiently manage and delete your emails:
Steps to Mass Delete Emails on iPhone:
- Open the Mail App: Locate the Mail app icon on your iPhone’s home screen and tap to open it.
- Select a Mailbox or Inbox: If you have multiple email accounts set up, choose the mailbox or inbox from which you wish to delete multiple emails on iPhone.
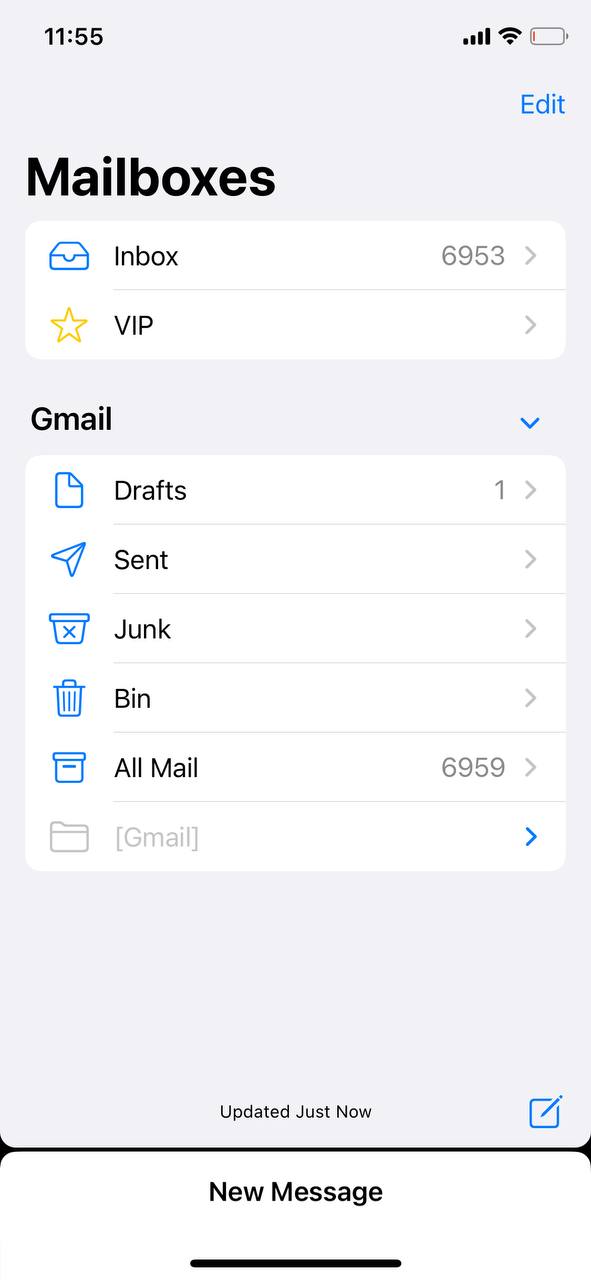
- Enter Edit Mode: Tap on the “Edit” button located at the top right corner of the screen.
- Select Emails: Tap on the circles beside each email to select them. If you wish to delete emails fast on iPhone, you can quickly swipe down the list to select multiple emails in succession.
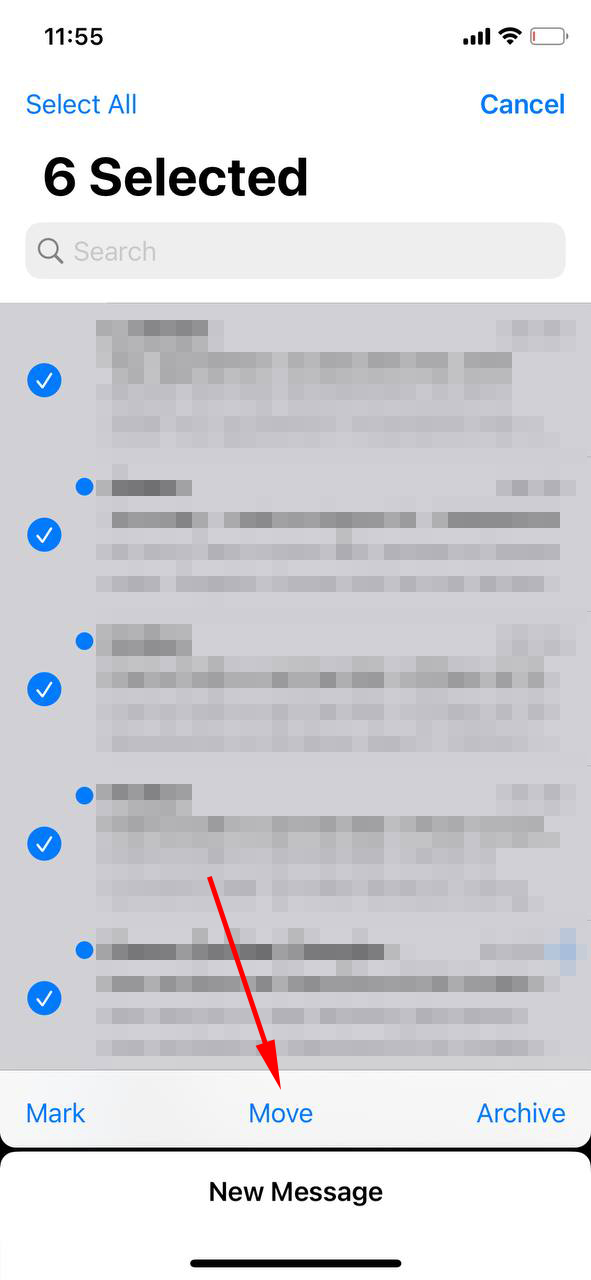
- Move to bin: Once you’ve selected all the emails you wish to delete, tap on the “Move” button located at the bottom of the screen. Then select Bin. This action will move the emails to the Bin folder where they will be deleted permanently after certain amount of time.
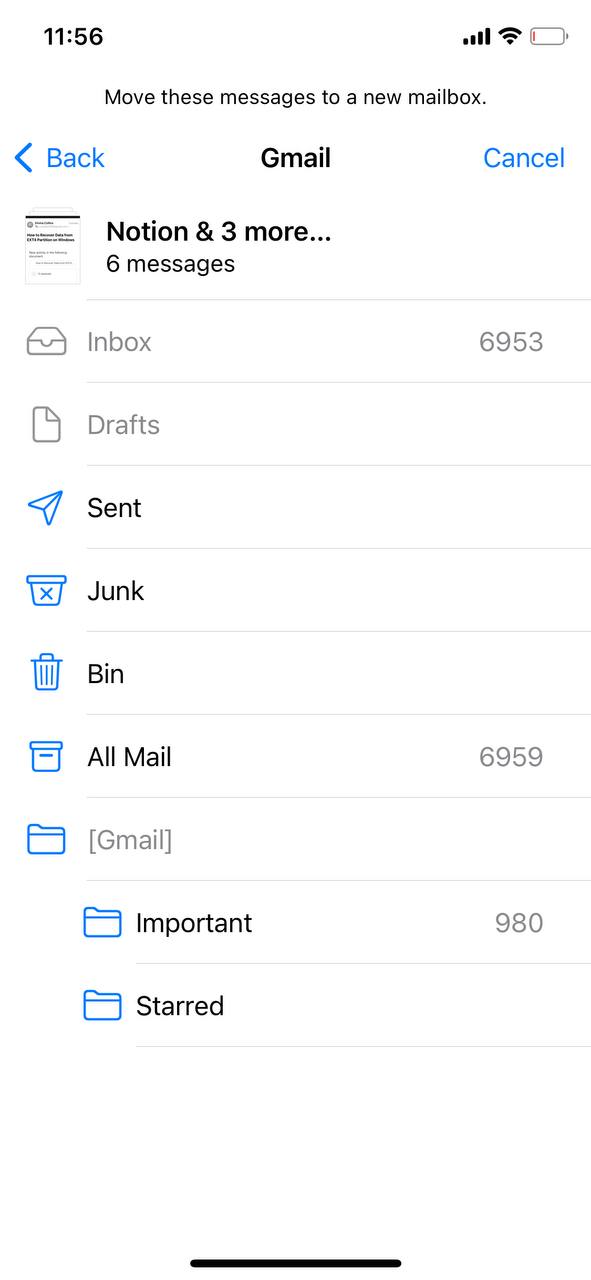
- Permanently Delete the Emails: To ensure the emails are permanently deleted, go to the Bin folder in the Mail app. Tap “Edit”, select the emails you wish to remove permanently, and then tap “Delete”.
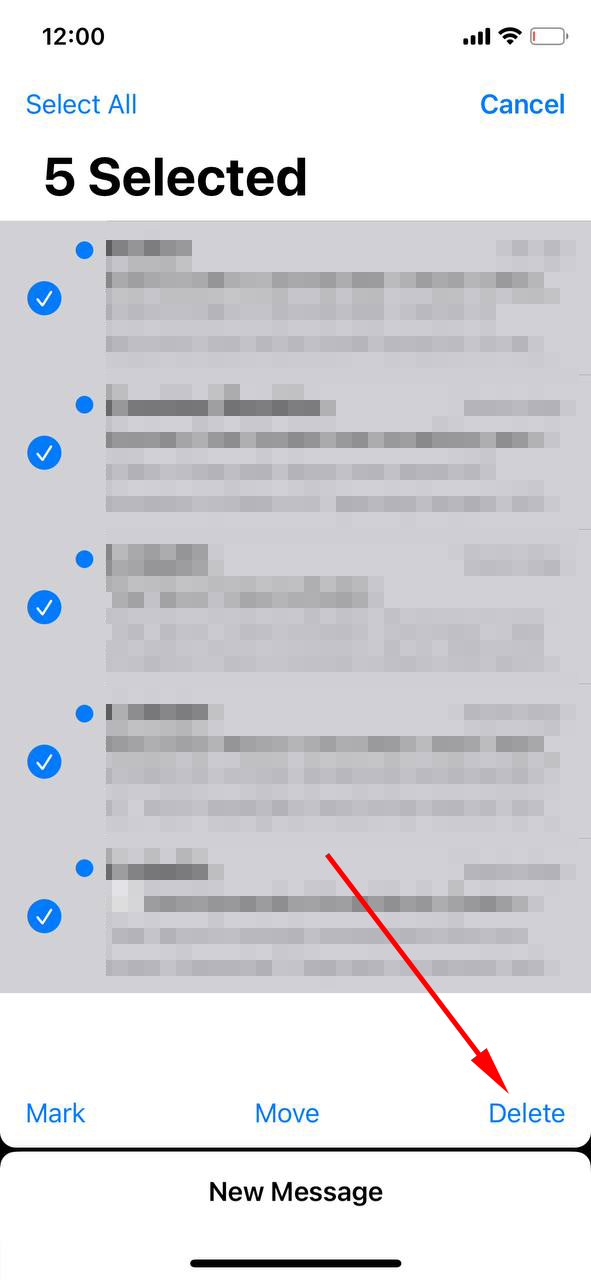
- Confirm Deletion: Depending on your settings, you might be prompted to confirm the deletion. Tap “Delete” or “Confirm” to finalize the process.
There you have it – a simplified process to bulk delete email on iPhone. Remember, it’s a good practice to periodically clean out your inbox to ensure optimal device performance. For more in-depth tips and tricks related to iPhone mail management, you can refer to this official Apple support page. Additionally, this guide by iPhoneLife offers visual aids and more strategies to manage your inbox efficiently.
Fastest Ways to Clear Emails on iPhone
While the iPhone’s native Mail app offers a straightforward approach to managing emails, there are times when we crave an even faster method, especially if our inboxes are flooded with unread messages. Luckily, there are several strategies, tools, and apps that promise a more efficient way to delete emails fast on iPhone. In this section, we’ll dive into these alternative techniques that offer the fastest way to delete emails on iPhone.
Third-party Email Management Apps
There are several apps available that can help bulk delete email on iPhone with more features than the native Mail app:
- Clean Email: This app groups emails based on the criteria you choose, making it easier to delete in batches. It also offers an Unsubscriber feature.
- Unroll.Me: While primarily an unsubscriber tool, it allows you to view your subscriptions in a list and quickly delete unwanted emails.
- Spark: A sophisticated email client, Spark offers features like Smart Inbox to help you prioritize important emails and swiftly manage the rest. It also provides batch actions to declutter your inbox faster.
Setting Up Email Rules
If you frequently receive emails from specific senders or with particular subjects that you wish to delete or move, setting up email rules can be beneficial. For example, you can set a rule to move all promotional emails directly to trash. Here’s a guide by AppleInsider on setting up rules.
Tips to Manage and Quickly Delete Emails on iPhone
The iPhone’s Mail app is intuitive and feature-rich, but mastering a few tricks can significantly enhance your email management experience. Whether you’re looking to delete emails fast on iPhone or simply want to adopt efficient email habits, the following tips are sure to elevate your iPhone email game.
- Use Threaded Conversations: Threaded view groups emails of the same conversation, making it easier to track related emails and delete multiple emails on iPhone in a single go. To enable:
- Customize Swipe Options: You can customize the Mail app’s swipe gestures to quickly delete, archive, or mark emails. This is a fast way to delete emails on iPhone without even opening them.
- Reduce Email Preview Lines: By limiting the number of preview lines, you can view more emails at once and clear emails on iPhone faster. To set:
- Utilize VIP and Flags: Assigning VIP status or flagging emails can help in quickly identifying important mails. This ensures that while you bulk delete email on iPhone, you won’t accidentally remove crucial messages.
- Set Up Filters: Filtering emails can help you prioritize your inbox. With a single tap, you can filter mails by unread, flagged, addressed to you, or from VIPs. This function assists you in navigating your inbox efficiently and aids in deleting multiple emails on iPhone that you deem less important.
- Limit the Number of Mails in the Preview: This setting controls how many recent emails the Mail app will fetch and display. Reducing this can speed up your email management.
Remember, the key to efficient email management is regular maintenance. Deleting and organizing emails routinely can ensure you never get overwhelmed. For more detailed insights and advanced tips, the offers extensive resources on mastering the Mail app. Additionally, the dives deeper into email organization and efficient habits.
Conclusion
In the fast-paced world of instant communication, emails remain an essential tool for both personal and professional interactions. The iPhone, being a widely-used device, offers a myriad of features to help users manage their digital correspondences. Yet, as with any tool, its efficiency depends on the user’s knowledge and approach. By understanding the nuances of iPhone email storage and using the strategies outlined in this article, you can ensure a streamlined, clutter-free email experience.
FAQ
To select multiple emails in the Gmail app on an iPhone:
- Open the Gmail app.
- Navigate to the folder or category you wish to manage.
- Tap on the circular avatar/icon next to an email to start selecting it. Once the first email is selected, you can tap other avatars/icons to select additional emails.
No, there’s technically no hard-set limit to the number of emails you can delete at once on your iPhone. However, depending on the email app you’re using, selecting and deleting a large number of emails might slow down the app or cause it to become unresponsive.
To delete all emails from a particular sender using the default Mail app on iPhone:
- Open the Mail app.
- In the search bar at the top, type in the sender’s email address or name.
- View the search results and tap on “Edit” at the top right.
- Select the emails you want to delete or tap “Select All” if you want to delete all the emails from that sender.
- Finally, tap “Trash” or “Delete” to remove the emails.
There are several reasons you might not be able to delete some emails on your iPhone:
- The email server may be temporarily down.
- There might be an issue with the email account settings on your iPhone.
- The email might be corrupted or have an attachment that’s causing an issue.
- You might be out of storage space on your iPhone.
In these cases, you can try refreshing your email, checking your account settings, or restarting the Mail app.
To ensure that deleted emails don’t reappear:
- Ensure your iPhone is syncing correctly with the email server. Check the account settings and make sure the server settings are correct.
- After deleting emails, make sure to empty the “Trash” or “Deleted Items” folder in your email app.
- If you’re using an email client on another device (like a computer), make sure emails are also deleted from that device.
- If you continue facing issues, consider removing and re-adding your email account to the Mail app.
