In today’s interconnected world, messaging apps have transformed the way we communicate. Viber, in particular, stands out for its widespread adoption among iPhone enthusiasts. Its seamless interface and rich features have endeared it to many. However, behind the scenes, there’s a technical aspect often overlooked: cache data. Like many applications, Viber accumulates cache, which, if not managed, can hinder performance. This article delves deep into the importance and benefits of clearing this cache on iPhones.
Why Clear Cache in Viber on iPhone?
With the widespread use of messaging apps, Viber has become a household name, especially among iPhone users. But, as with many apps, prolonged use of Viber can lead to accumulation of cache data. Cache is a set of temporary data stored by the app to speed up its processes. However, over time, this cache can pile up, causing some unexpected issues. Let’s explore the benefits of opting to clear Viber’s cache on an iPhone and how it can alleviate common problems faced by users.
Firstly, understanding the role of cache can be pivotal. While it’s designed to speed up your app processes by remembering certain actions and data, it’s not always flawless. For Viber users, especially on iPhones, here’s a table explaining why it’s essential to occasionally clear the accumulated cache:
| ? Benefits of Clearing Cache | ? Description |
| ⚡ Enhanced Performance | Overloaded cache data can slow down Viber’s functionality. Clearing it boosts the app’s speed and responsiveness. |
| ? Free Up Storage Space | Cache, especially from frequently used apps like Viber, consumes valuable storage space. Clearing it reclaims this space. |
| ? Fix Glitches and Errors | Some users report unexpected crashes or glitches. Often, these issues arise from corrupt cache data. Clearing cache resolves such problems. |
| ? Updated Content | Cache might prevent users from viewing recent content or updates. Clearing cache ensures access to the latest features on Viber. |
Consequently, understanding the importance of cache management is pivotal for optimal app performance. According to LifeWire, maintaining a balance between storing and clearing cache is key, especially in data-intensive apps like Viber. For iPhone users seeking a seamless Viber experience, regularly opting to clear data on Viber iPhone is a proactive step.
How to Clear Viber Cache on iPhone: Step-by-Step Guide
Clearing the Viber cache on your iPhone can improve the app’s performance and free up storage space. Here’s a detailed guide to help you clear Viber cache iPhone efficiently.
-
- Open the Viber app on your iPhone.
- Tap on the More tab (usually represented by three dots or lines) located at the bottom right corner of the screen.
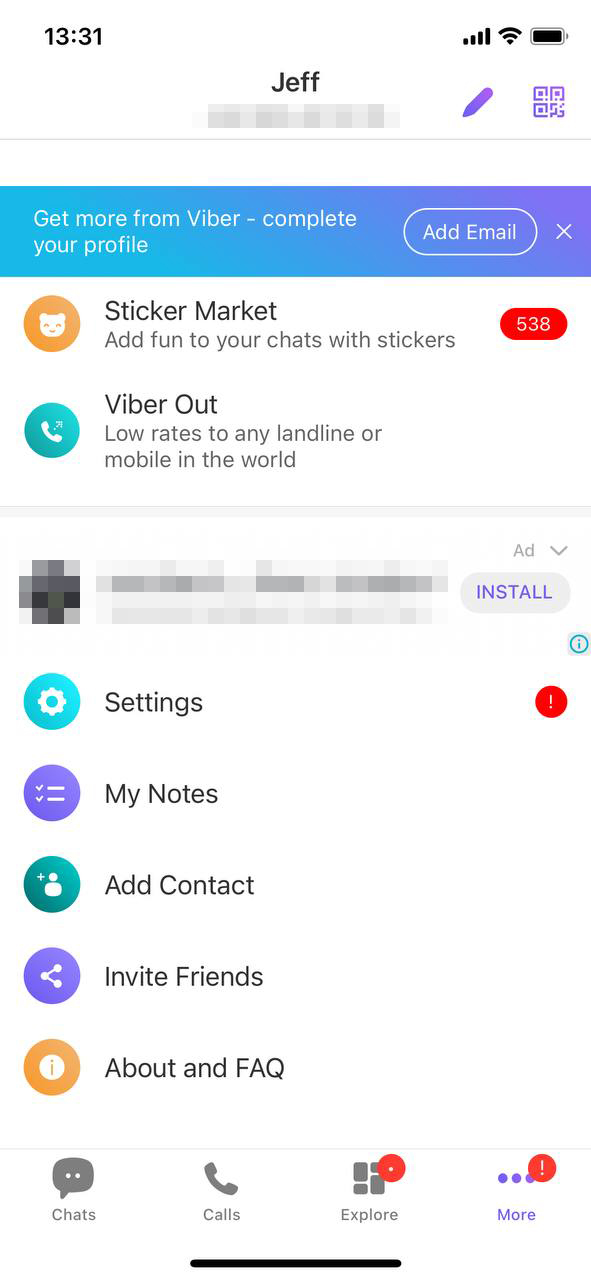
- From the menu that appears, select Settings.
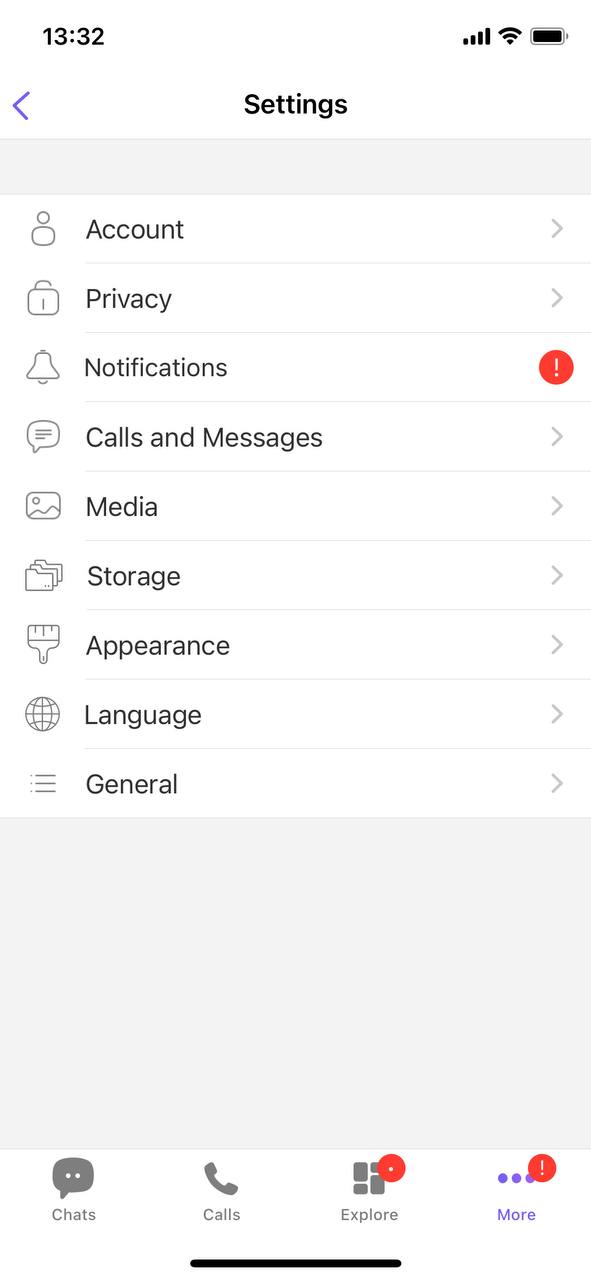
- Here, you’ll find a section labeled Storage. Tap on it.
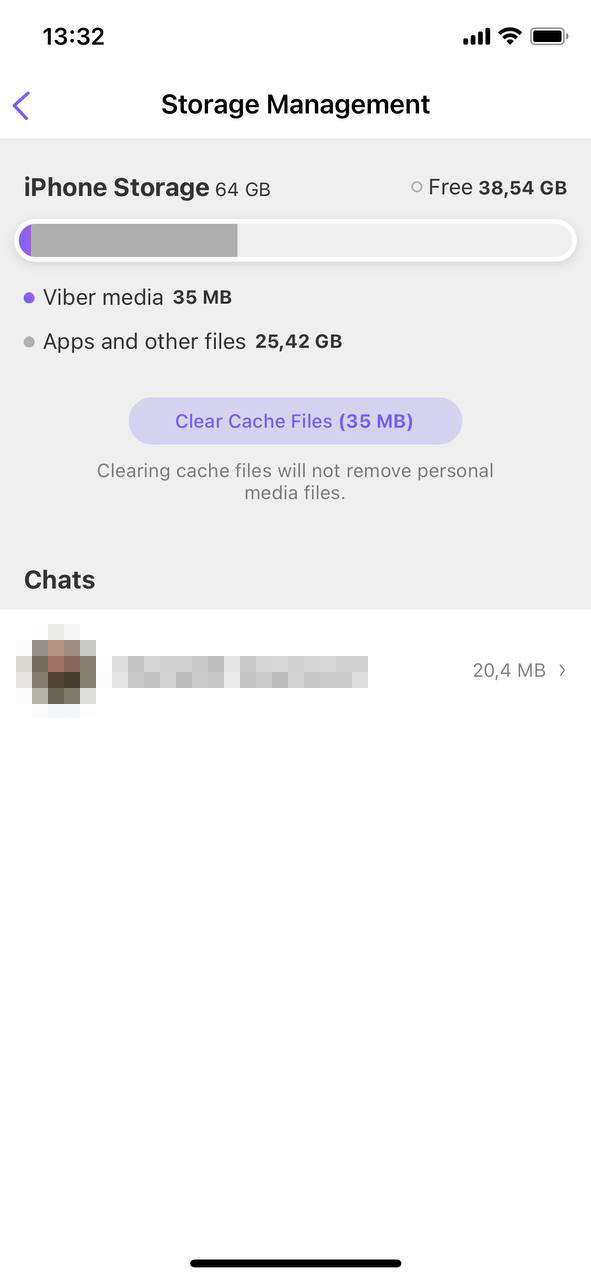 Under Storage Management, you will see a breakdown of storage used by messages, photos, videos, and other files. You should also find an option to clear cache files or a similar label indicating cache data. Simply tap on it to clear the cache.
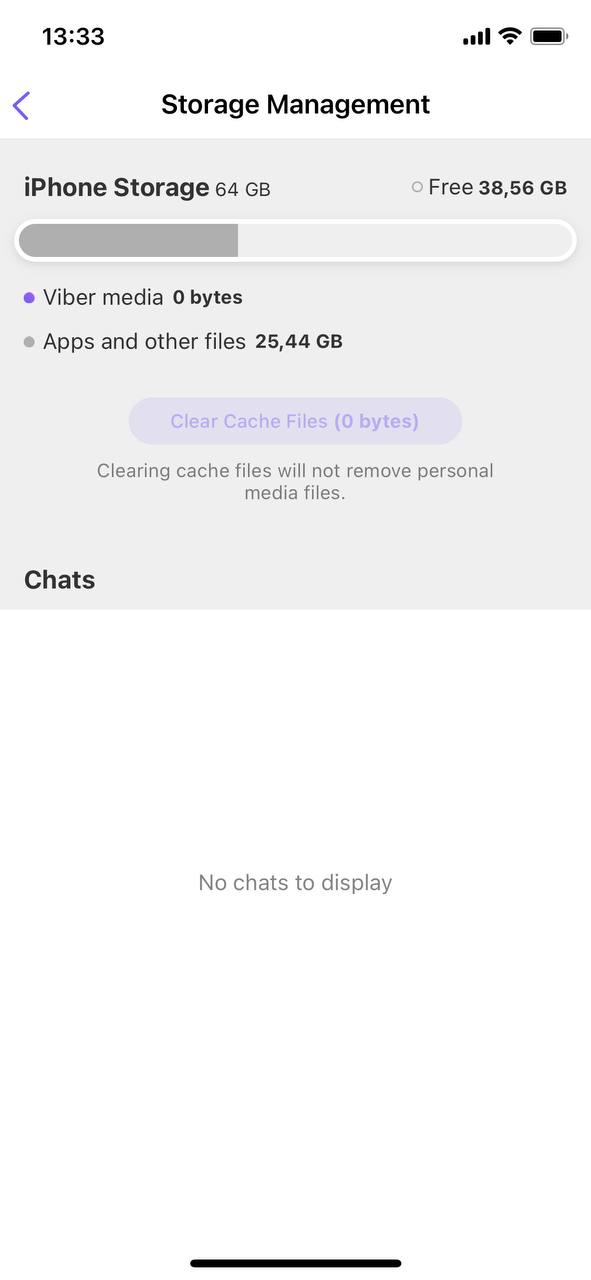
Note: Clearing the cache will remove temporary files that the app stores for faster performance, but it will not delete your personal chats or media in Viber. Periodically clearing the cache can help ensure optimal app functionality.
Advanced Solutions: When Clearing Viber Cache Doesn’t Solve the Issue
If clearing Viber’s cache doesn’t resolve your issues, there might be deeper problems at play. Here are some advanced solutions to consider:
Option A: Reinstall the Viber app
Reinstalling Viber can provide a fresh start, potentially resolving persistent issues:
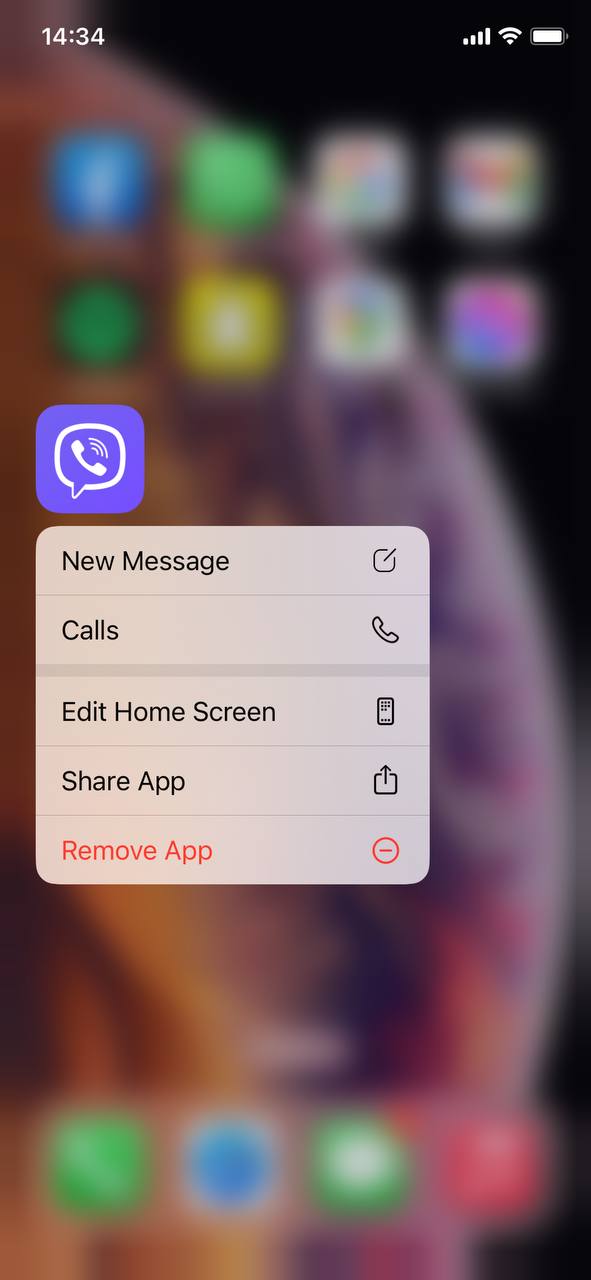
- Press and hold the Viber app icon on your home screen.
- Choose Remove App from the options that appear.
- Once deleted, restart your iPhone.
- Visit the App Store, search for Viber, and reinstall it.
- Open Viber and set it up using your phone number.
Option B: Check for Viber updates on the App Store
Using an outdated version of Viber might cause issues. Ensure you’re on the latest version:
- Open the App Store on your iPhone.
- Tap on your profile icon at the top right corner.
- Scroll down to see available app updates. If there’s an update for Viber, tap Update next to it.
Option C: Reset iPhone settings
If you suspect the issue might be broader than Viber, consider resetting your iPhone’s settings. This won’t delete personal data but will revert settings to default:
- Go to iPhone Settings.
- Select General.
- Scroll to the bottom and choose Transfer or Reset iPhone.
- Select Reset All Settings.

Note: Always ensure you’ve backed up your iPhone before making any significant changes or resets.
For more insights into iPhone troubleshooting, the official Apple Support page is a great resource. If you believe the problem is specific to Viber, consider reaching out to Viber’s support for further assistance.
Prevention and Maintenance: Ensuring Smooth Viber Experience on iPhone
To ensure a seamless Viber experience on iPhone, it’s essential to adopt proactive measures and maintain the app regularly. Here’s a table presenting best practices for optimal Viber usage:
| ?️ Maintenance Action | ? Description |
| ? Regularly Clear Viber Cache | Periodically clear cache Viber iPhone to prevent storage bloating and ensure smooth app functionality. This step refreshes the app, removing temporary files that might cause hiccups. |
| ? Avoid Overloading with Unnecessary Media | Regularly clean out old or unneeded media. While memes, GIFs, and videos are fun, they can rapidly take up significant storage, slowing down Viber’s performance. |
| ? Update the Viber App Regularly | Stay updated with the latest Viber version to benefit from bug fixes and new features. Regular updates, available on the App Store, ensure optimal app performance. |
| ? Monitor iPhone Storage | Keep an eye on your iPhone’s overall storage. When storage is limited, it can affect the performance of apps, including Viber. Check and manage your storage through iPhone Settings periodically. |
By integrating these best practices into your routine, you not only ensure Viber’s optimal performance but also enhance your iPhone’s overall functionality.
It’s not just Viber where regular cache management is pivotal. Other apps, including the Safari browser, also accumulate cache and history data. Clearing this data from time to time ensures that your device runs optimally.
Conclusion
Living in the digital era, we often enjoy the fruits of innovation without delving into the intricacies that make our experiences seamless. Apps like Viber simplify communication, but the background processes, particularly cache management, demand attention. What happens when cache goes unchecked? Cache, though beneficial in speeding up processes, can become a double-edged sword if it accumulates unchecked. iPhone users, in their quest for uninterrupted messaging on Viber, must be vigilant about managing this cache. Adopting regular practices like clearing cache, updating the app, and monitoring storage are not just recommendations; they are necessities. By doing so, we not only ensure a smoother Viber experience but also optimize our iPhones’ overall performance, leading to a more harmonious digital life.
FAQ
The ‘Clear Cache’ option may not be immediately visible due to several reasons. You might be using an outdated version of Viber, or the option might have been relocated in a newer version. Always ensure you have the latest Viber version and check under settings or storage options.
On iPhones, the Viber cache is stored within the app’s data folder. It’s not directly accessible to users without specific tools or apps. Generally, the cache is managed by the application and the iOS system.
No, clearing the cache does not delete your personal data like messages, call logs, or contacts. It only removes temporary files that help the app run faster. Think of it as cleaning up unnecessary files that accumulate over time.
Generally, it’s not required to clear the Viber cache regularly. However, if you’re facing issues with the app’s performance or storage constraints, you can consider clearing it. For optimal performance, it’s a good idea to clear the cache once every few months or when you notice issues.
